Audit
An audit of your inventory allows you to ensure that you have the correct number of items at the correct locations. You can perform an audit at any time or optionally create Audit Windows to set specific time frames for audits to be completed at specified locations.
Note: Site-Item/Category Restrictions do not apply to the Audit process.
To Access Items to Audit
There are two ways to access items to audit:
Method 1
- Select a Location and a Start Date/Time.
- In the Audit Details section, scan or type in a specific item tag in the Scan Here field. The item will appear in the grid.
Method 2
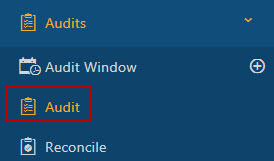
- Click on the Audits > Audit.

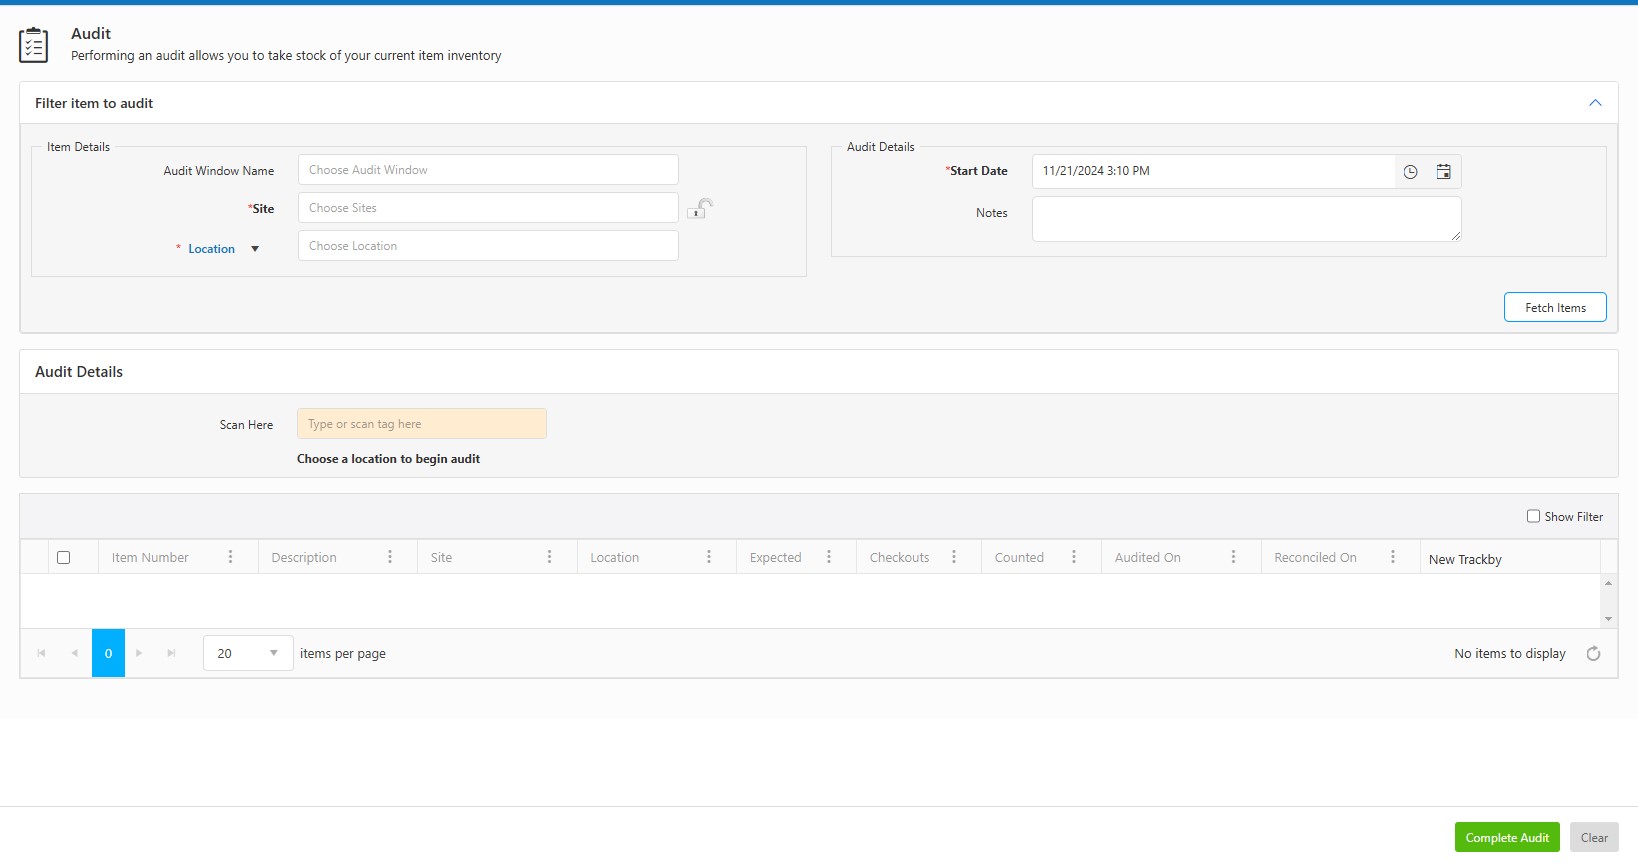
- The Audit screen will appear.

- In the Filter Item to Audit section, provide the following information:
Item Details
- Select the audit window name (optional) to include the item(s) for auditing.
- Choose the site (required) where the audit will take place.
- Select the location or container (required) from the dropdown. Note: The container feature is scheduled for a future release.
- The location field will display the site and location name when hovered over with the mouse. Likewise, hovering over a selected container will show the site, location, container type, and container ID.
Location

Container

- The location/container field is an autocomplete dropdown for selecting either locations or containers. If "Container" is selected and no containers match the search (with a non-empty query), the dropdown automatically switches to search for locations. The same logic applies when "Location" is selected. The field name updates dynamically between "containers" and "locations" based on the search results.
Audit Details
- Select the start date and time (required) accordingly.
- Enter notes, if any.
- Click on the Fetch Items button.
Note: During the audits, the user can fetch the items that have not been counted and to figure out what has not been counted, the InventoryCloud needs to know "Not counted since when?". In this case, the Audit Window will remember when a particular audit has started. In the Audit page, when an Audit Window is selected, the InventoryCloud helps the user to avoid recounting the same items again.
So with an Audit Window, by default, if you audit a location once, the Items in that location are no longer fetched. In this scenario with the Audit Window, you have to take a different approach when 'recounting' in the same location.
For the recount scenario, to fetch all the Items in the location again, simply select the site and location without selecting the audit window. An alternate method is to simply change the start date to the date when the recount started (later than the Audit Windows start date).
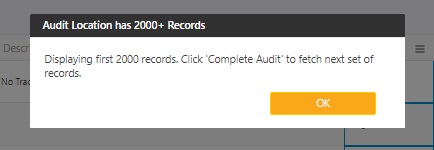
- After clicking the Fetch Items button, if the number of items is over 2000, the below message will appear. Click on the OK button to proceed.
Note: If the number of records is over 2000, the grid will display the records in a batch of 2000.

- The items will be displayed on the bottom grid.
Note: Once you have fetched the items in a location, no need to fetch them again. Every time you access the Audit page, it will show the last fetched Items. The record will get updated only if you try to fetch a new set of items by giving a new location, site, audit name, or start date. When you try to access another page, the system will give an alert message indicating that "There is unsaved data on this page. If you leave this page now you will lose all unsaved data. Do you want to leave this page?" Click on Leave or Cancel button.

- You can quickly filter the results on the lookup page. Click on the Show Filter checkbox and enter the text you want to filter.

- Counted - Enter the count.
Note: The application will always retain the updates made on the Audit page i.e. you need not have to update the entered every time you log in or access this page. A discrepancy indicates the difference between the Expected Count and the Actual Count. Example - If the user counts 9 but the system expected 10, at the time this column will show -1. If there was no prior Audit Count the column will show nothing - blank (not 0).
- New TrackBy - While Auditing, the New TrackBy button will appear for the items that have tracking enabled. Refer to topic - Tracking Details.
Note - The Audit is primarily for dealing with inventory currently in stock, Trackbys in Audit would behave a little differently than Add transactions. Auto-generated serial numbers are not supported on Audit, for example, all Serial numbers must be specified when adding quantity. Also, when quantities of items tracked by ‘Serial number on removal’ end up missing, there is no need for the user to enter the serial number when adjusting/auditing down.
![]()
To Mark an Item as Audited
- Select the checkbox next to the Item in the grid that you want to mark as audited.

- Click on the Complete Audit button.
- The message will appear indicating that the Audit is performed for the "X" number of records. In the below image, X is 1.

- Similarly, complete the audit for the remaining Items and click on the Complete Audit button. The Message will appear indicating that the Audit is completed for X Items.