Form Customization
InventoryCloud allows you to customize almost every screen (form) to include information specific to your business. The Form Customization feature allows you to change field names, add or remove fields from a screen or add/remove custom fields.
Custom fields allow you to define fields in InventoryCloud to capture information specific to your needs. For example, if you want to capture a special code called Widget Code for each Item entered into InventoryCloud, you can do so by creating the field and setting its parameters on the Form Customization page.
Adding a Custom Fields
- Click on the Settings > Form Customization.
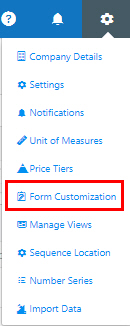
- The Form Customization screen will appear.

The Form options are: Add Inventory, Adjust Inventory, Audit, Audit Reconcile, Audit Window, Autobuild, Build, Check In, Check Out, Container, Customer, Inventory Transaction, Item, Location, Main, Manufacturer, Mobile Add, Mobile Adjust, Mobile Audit, Mobile Build, Mobile Checkin, Mobile Check Out, Mobile Details, Mobile Item, Mobile Main Menu, Mobile Move, Mobile Pick, Mobile Receive, Mobile Remove, Move, Pick, Pick Order, Purchase Order, Receive, Remove Inventory, Roles, Shipping Provider, Site, Universal Order, Unit of measure, User, Vendor, View Build Order.
Adding Custom Field
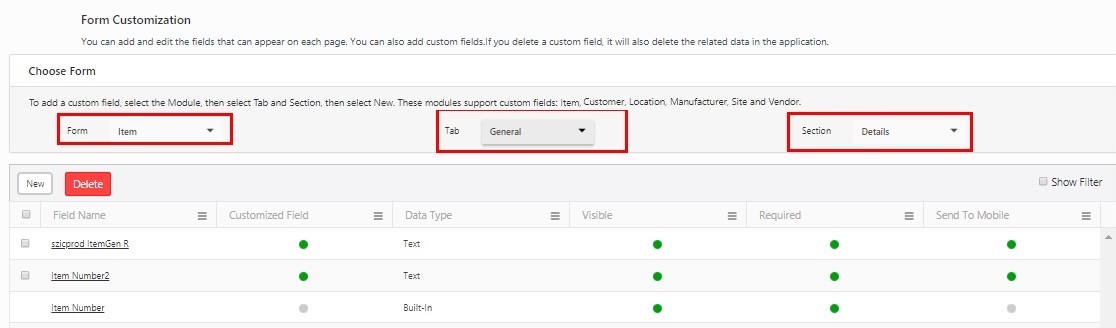
- Select the module from the Form field. For example - Item.
- Select one of the options in the Tab field. For example - Custom Field.
- Select the section in the Section field. Example: Custom Field.
- Click on the New button.
- A New Custom Field In screen will appear.
- Select the Data Type. The options are Text, Numbers, Pick List, and Extended Text.
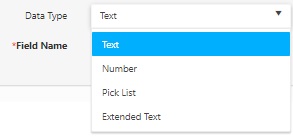
- Text - is a standard text field into which the user can type a value.
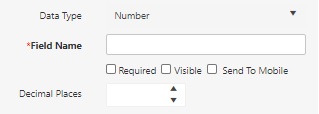
- Number - is a standard text field into which the user can type a numerical value.
- Enter/Select the Decimal Places. This field will appear if the Data Type is set as Numbers.
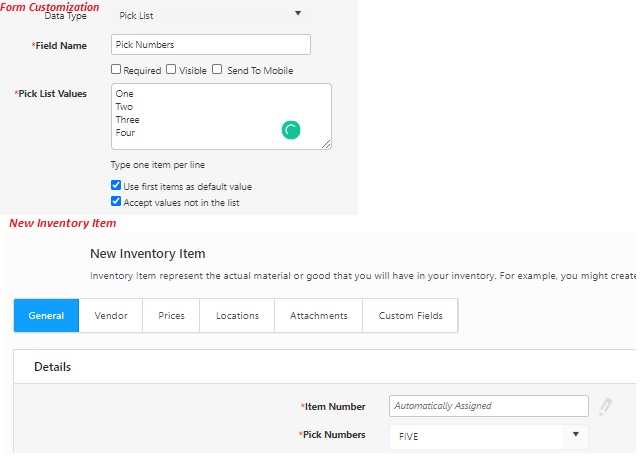
- Pick List - is a dropdown menu. The values can be easily searched using the search box provided on the top of the list.
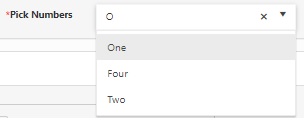
- Click on the checkbox if you want to "Use first items (in the pick list) as default value".
- Click on the checkbox if you want to "Accept values not in the list (indicates that users will be able to type in additional values that you did not include in your list)".
Example - Consider that you have added "one, two, three, four" as a pick list value. while entering the value in the custom field, if the user wants an option "five". then it can be easily added, if this checkbox is selected.
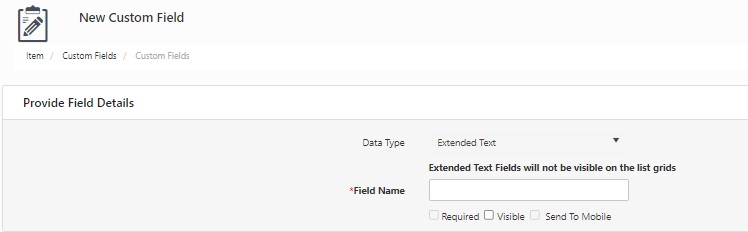
- Extended Text - Enter the Extended Text. It is used to extend the description for items by adding extra lines as extended text. Note: Extended Text Fields will not be visible on the list grids.
- Enter the Field Name.
- Click on the checkbox (s) if the field is - Required, Visible, and Send To Mobile.
- Required - indicates the field is mandatory.
- Visible - indicates that the field will be visible to all authorized users.
- Send to Mobile - indicates that the field will be sent to and visible on mobile devices.
- Click on the Save button. The Custom Field will appear in the field list for the selected screen.

Editing a Custom Field
- Click on the Settings > Form Customization.
- The Form Customization screen will appear.
- Select the Form, Tab, and Section (if needed) to locate the field you want to modify. In the example below, we have selected the Item screen > General tab >Details tab.
- Click on the Field Name Link to update the custom field details.

- The View/Edit Custom Fields screen appears.

- Update the required fields.
- Select Data Type. The options are Text, Numbers, Pick List and Extended Text.
- Enter the Field Name.
- Enter/Select the Decimal Places. This field will appear if the Data Type is set as numbers.
- Enter the Pick List Value. This field will appear if the Data Type is set as Pick List.
- Extended Text - Enter the Extended Text. It is used to extend the description for items by adding extra lines as extended text.
- Click on the checkbox (s) if the field is - Required, Visible, and Send To Mobile.
- Click on the Save button.
- A message will appear, indicating that the custom field is updated successfully.
Reset to Default
- In the Form Customization screen, select the Form, Tab, and Section.
- The List of custom fields will appear at the bottom of the screen.
- Select the field you want to set it as Default.
- Click on the Field Name Link to update the custom field details.
- The View/Edit Custom Details screen appears.
- Click Reset to Default.
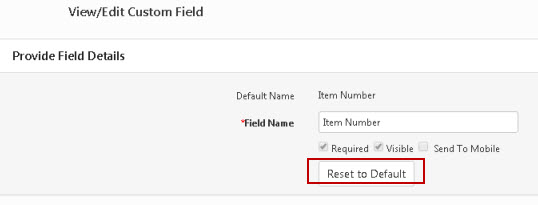
- Click on the Save button. The field name will return to the default value across all screens and reports.
Deleting a Custom Field
- In the Form Customization screen, select the Form, Tab, and Section.
- The List of custom fields will appear at the bottom of the screen.
- Search for the custom field which you want to delete and click on the checkbox.
- Click on the Delete button.

- A confirmation message will appear.
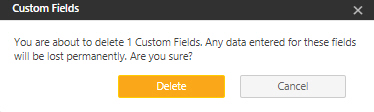
- Click on the Delete button again.
- A message will appear indicating that 1 custom field has been deleted successfully.