Reconcile
Audit discrepancies (a different quantity or location than expected was entered during Audit process) or items not audited (because they were not found, for example) are displayed on the Reconcile screen. The Reconcile Audit screen allows you to correct any discrepancies found during auditing, such as mismatched locations or quantities that do not match.
Site-Item/Category Restrictions on Reconcile
To Reconcile an Audit
- Select Audits > Reconcile.

- The Reconcile Audit screen will appear.

Item Details
- Select the Audit Window (optional) for reconcile.
- Choose the site (optional).
- Select the location or container (required) from the dropdown. Note: The container feature is scheduled for a future release.
- The location field will display the site and location name when hovered over with the mouse. Likewise, hovering over a selected container will show the site, location, container type, and container ID.
- The location/container field is an autocomplete dropdown for selecting either locations or containers. If "Container" is selected and no containers match the search (with a non-empty query), the dropdown automatically switches to search for locations. The same logic applies when "Location" is selected. The field name updates dynamically between "containers" and "locations" based on the search results.
- In the Filter by Date section, select the Start Date and Time accordingly.
- Click on the Fetch Items button.
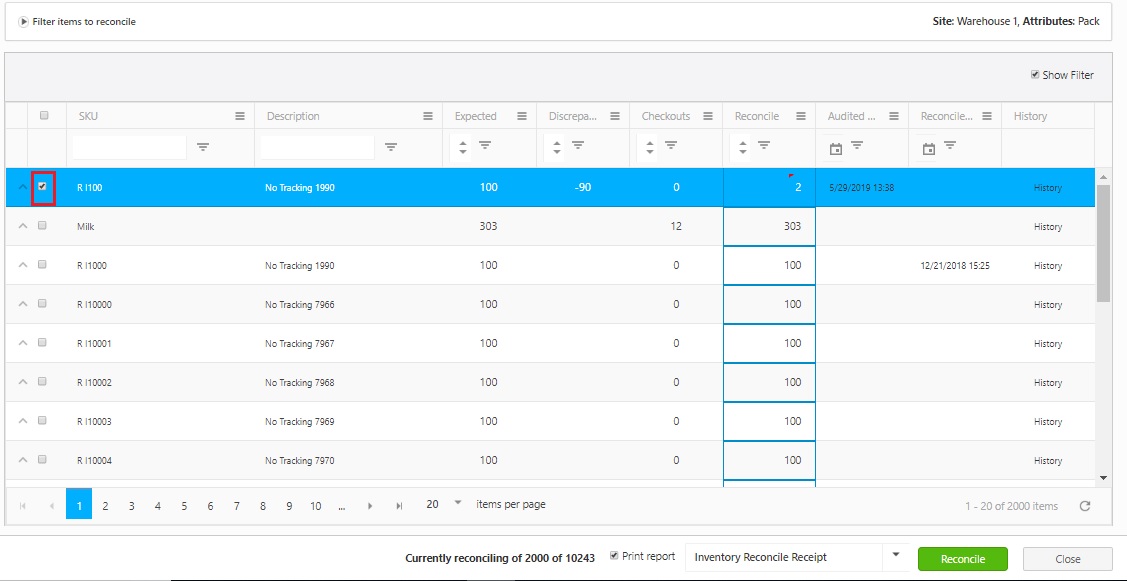
- Audit discrepancies (a different quantity or location than expected was entered during the Audit process) or items not audited (because they were not found, for example) are displayed on the Reconcile screen. The list will display the Audited Quantity (in orange) and the Expected Quantity along with the site and location at which the item was found. Items that were not audited because they weren't found are also displayed here.
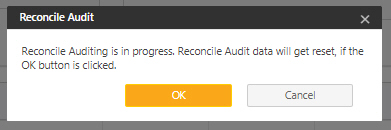
- After clicking the Fetch Items button, If the number of Items is more then 2000, the below message will appear. Click on the OK button to proceed.
Note: If the number of records is more then 2000, the grid will display the records in a batch of 2000.

- The items will be displayed in the bottom grid.
Note - Once you have fetched the Items in a location, no need to fetch them again. Every time you access the Reconcile page, it will show the last fetched Items. The record will get updated only if you try to fetch a new set of items by giving a new audit name, site, location, or start date. Also, the application will give an alert message indicating that the "Audit is in Progress. The Audit data will be reset if you click on the OK button.
- You can quickly filter the results on the lookup page. Make sure the Show Filter checkbox is selected so that the Filter options are displayed. Enter the text you want to filter.
Note - Expected indicates the "Current Quantity" that the system currently expects in the system. A discrepancy indicates the difference in the expected count and reconcile count i.e.If the user counts 9 but the system expected 10 at the time this column will show -1. If there was no prior Audit Count, the column will show nothing - blank (not 0). Checkout indicates the current number of checkouts for the Item. Reconcile indicates the count entered by the user. By default, it is the current count plus the count under the discrepancy.

- Reconcile Quantity - Enter the count you want to report as audited. For example, if 6 laptops were expected but only 3 were found, you can enter 3, which will become the new expected quantity. Or, if after researching the discrepancy you find the additional laptop, enter 6 in the Reconcile Quantity field.
Track By's
- If the item has trackbys, click the arrow in front of the listing to display them.

- The track by detail will appear below the listing:

To Reconcile an Item
- Select the checkbox next to Item in the grid and click on the Reconcile button. You can click on the Print Report checkbox to print the Reconcile Audit Receipt.
- The message will appear indicating that "The changes made will be updated on the Items which cannot be revoked". Click on the Reconcile button. You can also cancel the changes by clicking on the Cancel button.

- After clicking on the Reconcile button, a message will appear indicating that X number of Items are reconciled successfully. In the below image X is 2.

- If the Print report check box is checked, the Reconcile Audit Receipt will open in another window, once you click on the Reconcile button. Note: In case the pop-ups are blocked and you are unable to view the print receipt, Refer Popups and Redirects to allow pop-ups and to view the print receipt.

Site-Item/Category Restrictions on Reconcile
The Reconcile is not allowed on an item that has Site-Item/Category restrictions. If the queue has an item that does not fall in a permitted category, then reconcile will fail and an error message will appear indicating that All Items cannot be audited. The item will show a warning message that "Transaction disallowed due to existing site/category restrictions.”

Also, refer to the topic Site-Item/Category Filtering on the Edit Site page and Working Site for more details.