
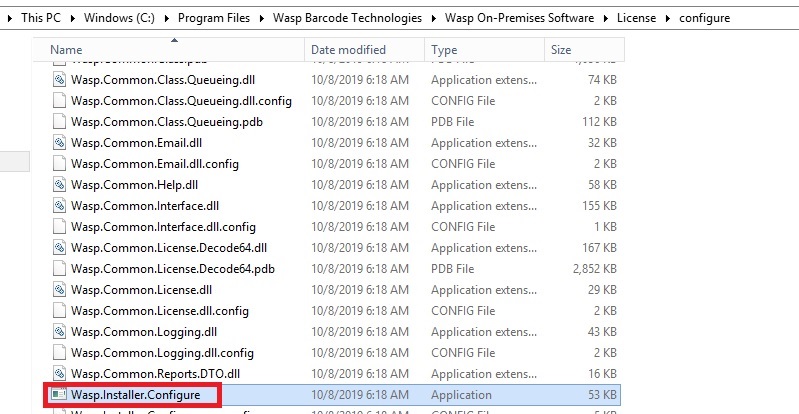
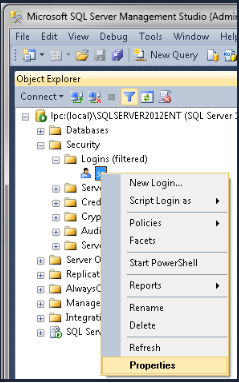
Follow the steps below to access the Wasp Configuration Tool:
Note: The password will be shared by the Wasp team along with the package

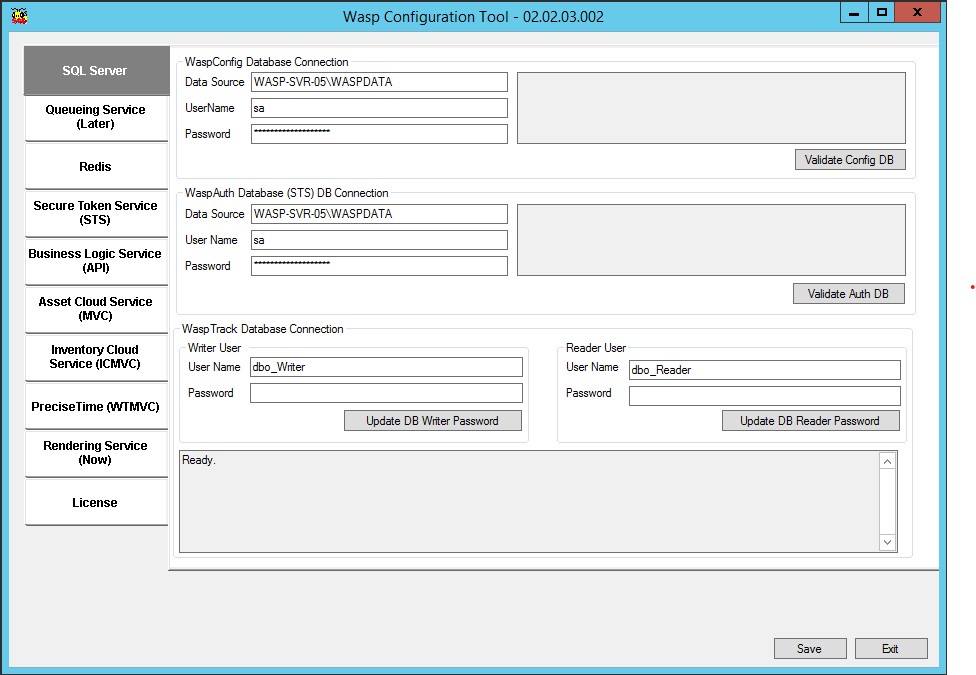
Username: dbo_Writer, Password: db0-Wr1ter_P455w0rd
Username: dbo_Reader, Password: db0_Re4der-P455w0rd
Note: If you would like to set your own writer and reader user credentials, this is where you would do so.
Note: We recommend deploying Wasp Cloud products behind a firewall and routing filtered traffic through to the IIS server with the Wasp Cloud MVC site. This practice usually changes the entry point URL of the application. In cases like this or any other change to the app URL, two changes are required:
Note: These bindings and the firewall routing should only allow access to the Wasp_AC or Wasp_IC site. Wasp API and WaspSTS sites need not be exposed to the public.
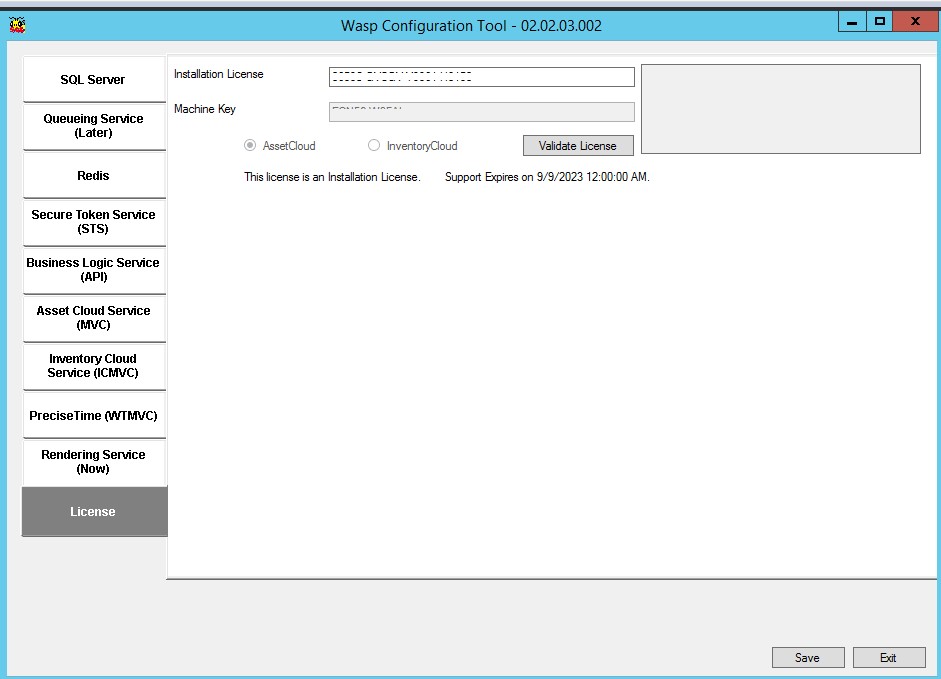
Note: The License tab within the configuration tool permits license entry solely from the machine where the API is installed physically.
Note on how the setup updates components that were moved after installation
The On Premise setup is able to detect if the following Components have been moved and will update them in their new location:
The Database and Redis are not updated by the OnPrem updater. Use the original OEM setups to update these software components.
During Updates other components, scripts and tools will be installed according to Microsoft guidelines in the directories specified by the environment variables %ProgramData%, %ProgramFiles% and ProgramFiles(x86) as appropriate.
Changing your database password is an important step in securing your system.
Warning: Changing the Database password, or any other configuration parameter may cause disruptions to any currently running OP instance. Please plan ahead for downtime because any changes done using the configuration tool generally require you to reboot the system. Plan ahead.
We provide a configuration tool to help you configure Wasp On-Premise software with the new sa password and much more.
To change the sa password for the database:
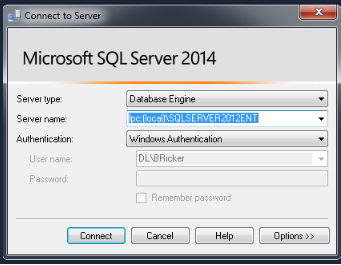
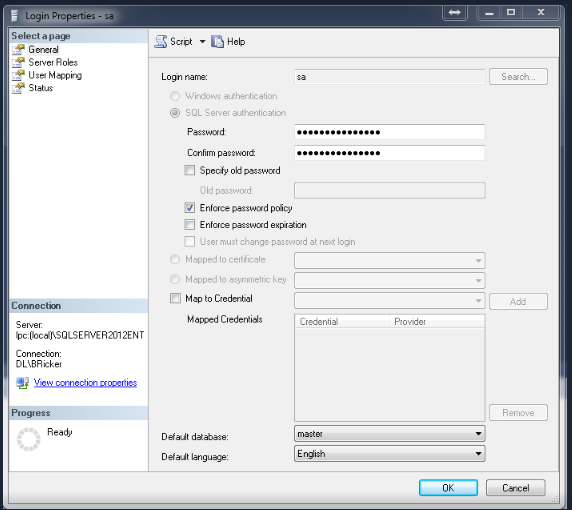
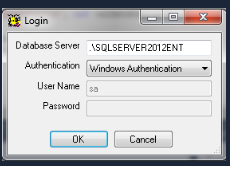
Note: Now that you’ve set the sa password, you can retrieve it any time by running the configuration tool on the database, logging in using “Windows Authentication” and clicking on the “Show Passwords” checkbox. The “Show Password” option will NOT be available until you assign your own sa password.
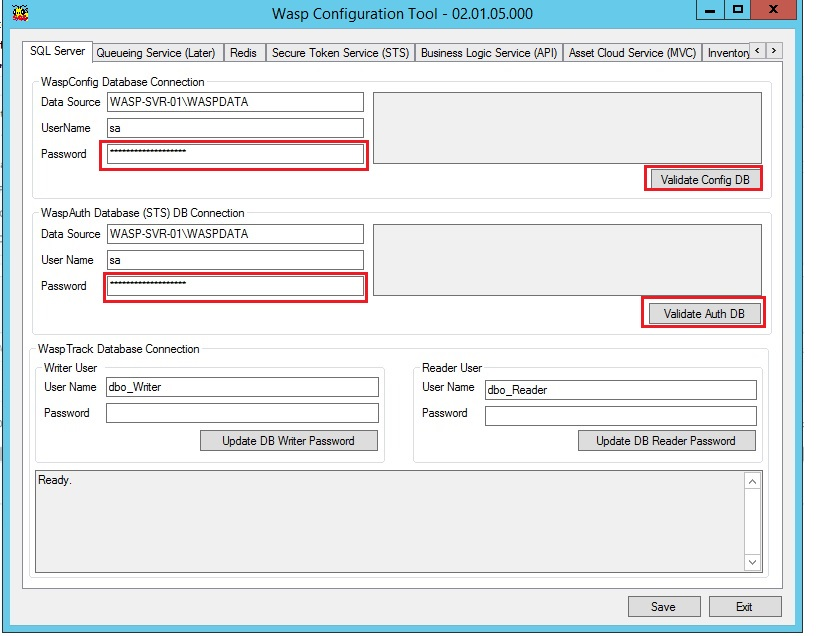
To change the SQL Server account password:
WaspAuth Database (STS) DB Connection
Note: If the database has the same password for the sa account, both Auth and Config sections MUST MATCH.
Note: Make sure to remember/note the new password. After making the above changes its important for the user to restart the World Wide Web service.
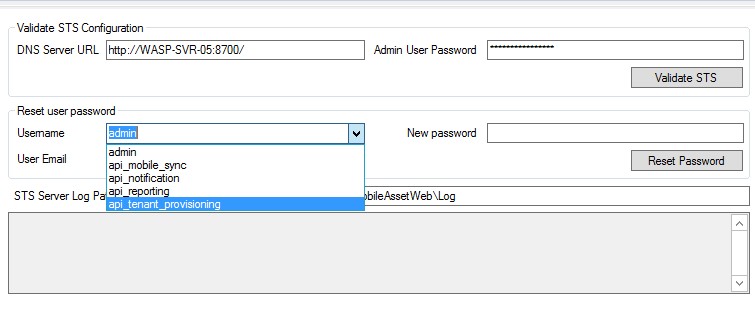
To change the Admin user password:
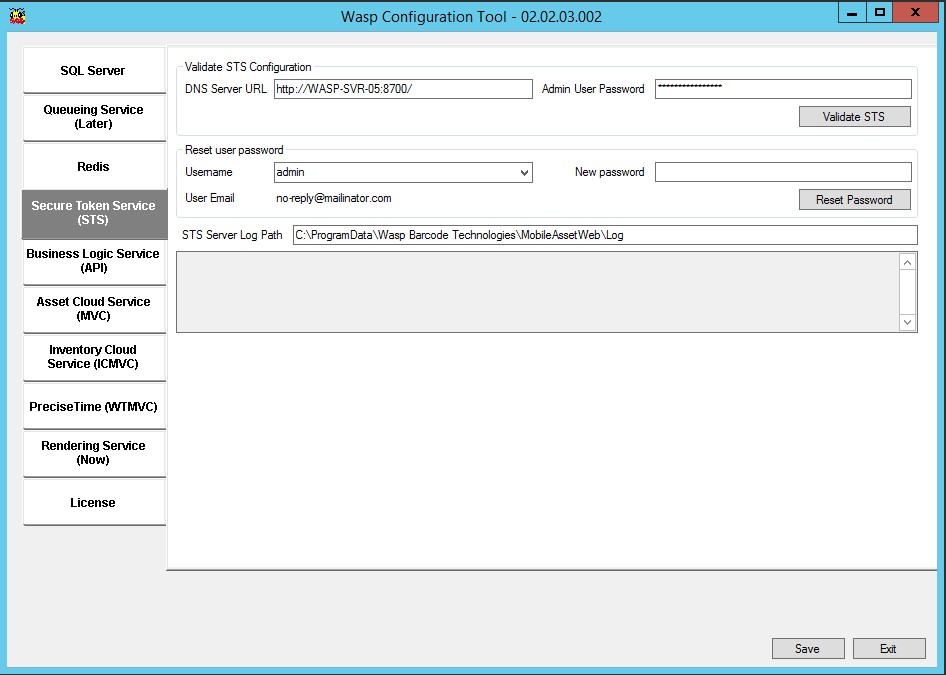
Reset User Password
Note: Make sure to remember/note the new password. After making the above changes its important for the user to restart the World Wide Web service.
The default port for InventoryCloud is 8703 and the other ports are 8700 and 8701.
Warning: If you just installed your On-Premise version and you need to change the port number, do that before you start inviting users.
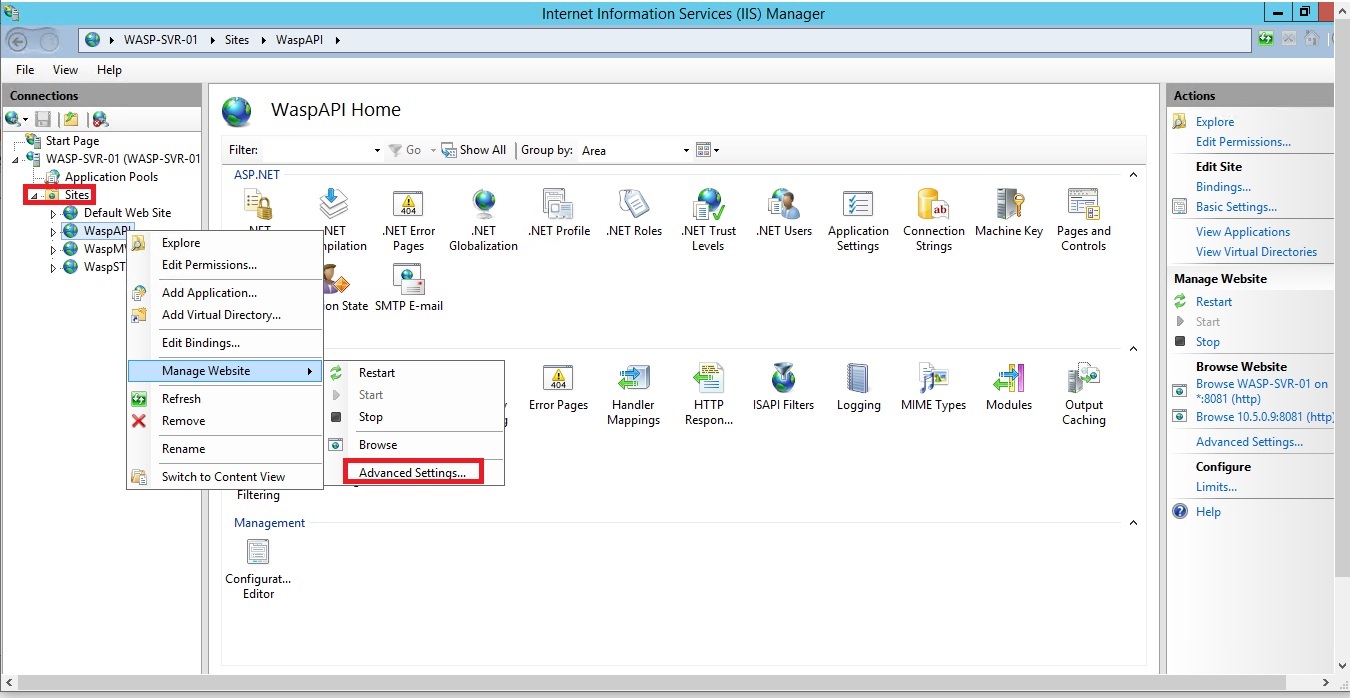
To find the default port:

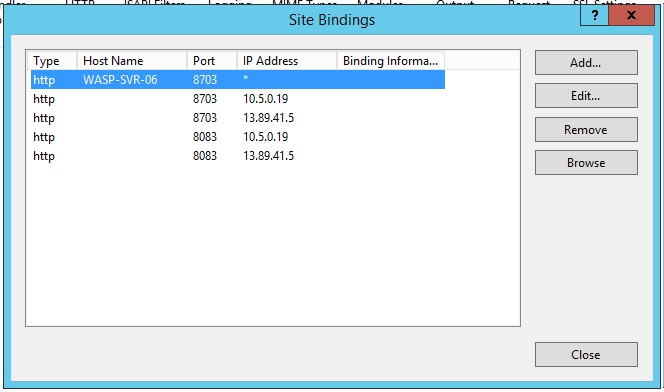
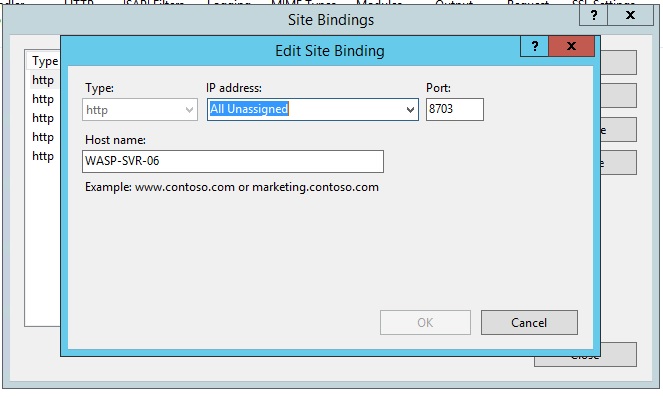
Note: We generally do not recommend users change these values without consulting Tech Support. But If you are changing the port number in IIS, make sure that the port number should match with the port number in the Wasp Configuration Tool.

Note: Make sure to remember/note the new Port Number. After making the above changes its important for the user to restart the World Wide Web service.
The user should reboot the machine after making changes in this tool.
Note: We recommend deploying Wasp Cloud products behind a firewall and routing filtered traffic through to the IIS server with the Wasp Cloud MVC site. This practice usually changes the entry point URL of the application. In cases like this or any other change to the app URL, two changes are required:
When setting up https please verify the https connection using the browser, preferably on the server itself than from external clients. After the browser successfully renders the login page via https then use the wasp configuration tool to verify that the software can access it and to reconfigure the system to use that address in mails, etc.
Following are the steps to configure the firewall:
Note: We generally do not recommend users change these values without consulting Tech Support. But If you are changing any of the details in IIS, make sure that the it matches with the details in the Wasp Configuration Tool.
Note: The firewall change overwrites changes to the port configuration in the Wasp Configuration Tool because the Port number becomes the part of the Firewall routing and the URL of the firewall is entered where the Port number was.
Note: After making the above changes its important for the user to restart the World Wide Web service.
SMTP configuration is the first step that you should do once you login to the InventoryCloud OP application.
Note: SMTP server settings must be entered to enable email features such as sending reports, notifications, etc. Refer to Configuring SMTP topic. You can add and invite users without SMTP. Refer to Register Users without SMTP topic.
 > Settings > Email > User Registration Without SMTP.
> Settings.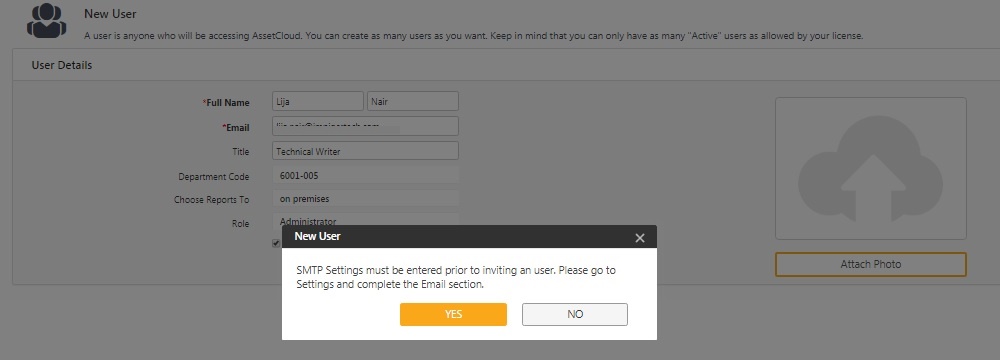

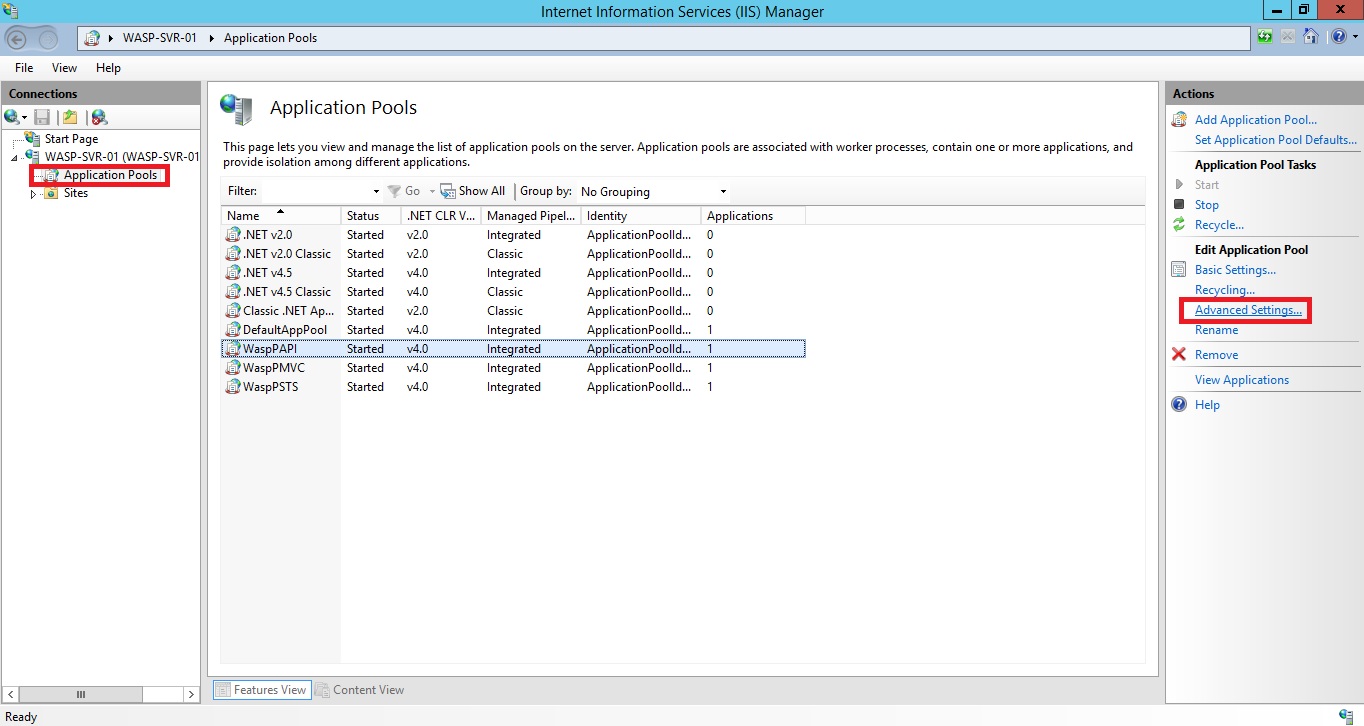
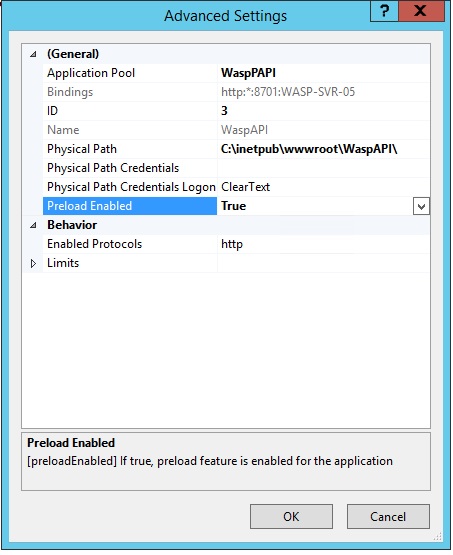
After the Cloud On-Premise software is installed successfully and you have confirmed you can log in successfully, make these changes in IIS Manager to improve performance. (Some settings may already be at the recommended value.)
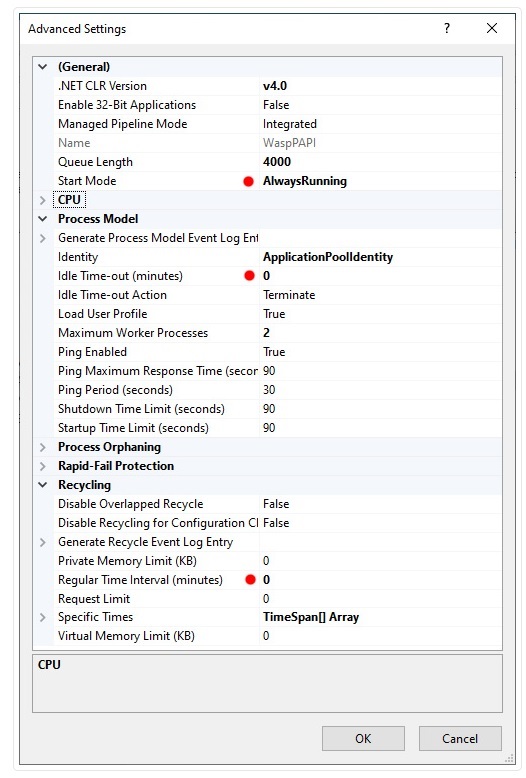
The Advanced Settings screen will appear. Make the following changes: Configuration
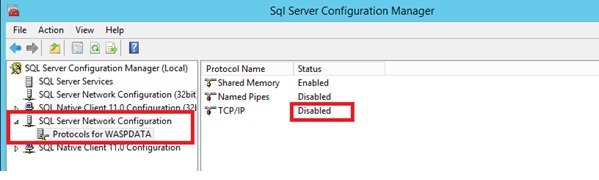
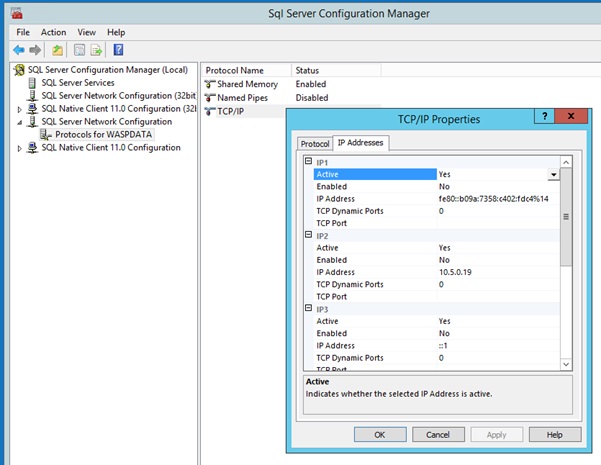
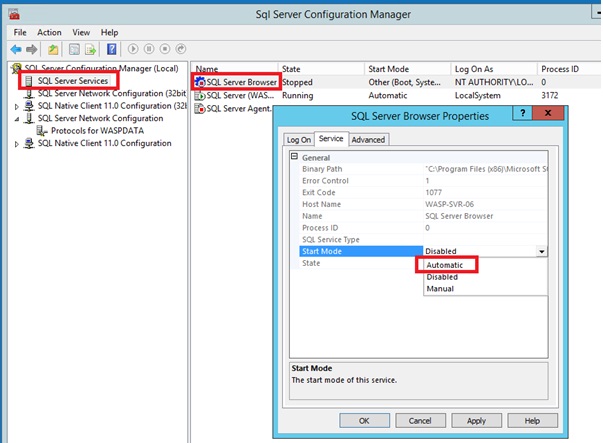
The DBs and SQL are only installed using the installer. The following configuration needs to be done manually if the “Connection Failed” error message appears.
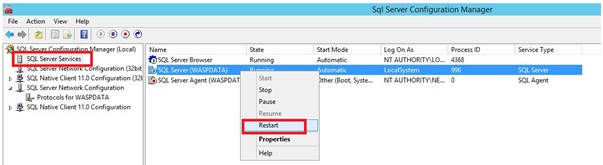
Procedure to stop and restart ("bounce") all of the services for Cloud On-Premise, then recycle the IIS app pools:
Stop services in this order
Start services in this order
Recycle Cloud OP (On-Premise) application pools in Internet Information Services (IIS) Manager
==============================================================================
If you want to make a batch file that will do this, include the lines below in a file called "Bounce OP Services (Admin).bat". When you need to run the file, right-click on it and Run As Administrator. The pause command at the end allows you to review the results before closing the command prompt.
Note: Because different versions have differently named Sites and Application Pools, there are 3 different potential batch files to accomplish the above.
============================================================================
RabbitMQ and Erlang is no longer required for InventoryCloud v02.01.05 or Newer
============================================================================
InventoryCloud v1.04.05 or earlier
net stop RabbitMQ
REM - stopping Rabbit also stops WaspNowService
net stop Redis
net stop MSSQL$WASPDATA
net stop WASPLaterService
net stop W3SVC
net start MSSQL$WASPDATA
net start W3SVC
net start RabbitMQ
net start Redis
net start WASPLaterService
net start WaspNowService
%windir%\system32\inetsrv\appcmd stop site /site.name:"WaspSTS"
%windir%\system32\inetsrv\appcmd stop site /site.name:"WaspAPI"
%windir%\system32\inetsrv\appcmd stop site /site.name:"WaspMVC"
::Flush Redis
cd C:\Program Files\Redis-3.0.504-64bit
redis-cli -h 127.0.0.1 -p 6379 -a r3dIkul00zSVmVs flushdb
redis-cli -h 127.0.0.1 -p 6379 -a r3dIkul00zSVmVs flushall
%windir%\system32\inetsrv\appcmd start site /site.name:"WaspSTS"
%windir%\system32\inetsrv\appcmd start site /site.name:"WaspAPI"
%windir%\system32\inetsrv\appcmd start site /site.name:"WaspMVC"
%windir%\system32\inetsrv\appcmd recycle apppool /apppool.name:"WaspPAPI"
%windir%\system32\inetsrv\appcmd recycle apppool /apppool.name:"WaspPMVC"
%windir%\system32\inetsrv\appcmd recycle apppool /apppool.name:"WaspPSTS"
pause
::end code::
============================================================================
InventoryCloud v2 or Newer
net stop RabbitMQ
REM - stopping Rabbit also stops WaspNowService
net stop Redis
net stop MSSQL$WASPDATA
net stop WASPLaterService
net stop W3SVC
net start MSSQL$WASPDATA
net start W3SVC
net start RabbitMQ
net start Redis
net start WASPLaterService
net start WaspNowService
%windir%\system32\inetsrv\appcmd stop site /site.name:"WaspSTS"
%windir%\system32\inetsrv\appcmd stop site /site.name:"WaspAPI"
%windir%\system32\inetsrv\appcmd stop site /site.name:"Wasp_IC"
::Flush Redis
cd C:\Program Files\Redis-3.0.504-64bit
redis-cli -h 127.0.0.1 -p 6379 -a r3dIkul00zSVmVs flushdb
redis-cli -h 127.0.0.1 -p 6379 -a r3dIkul00zSVmVs flushall
%windir%\system32\inetsrv\appcmd start site /site.name:"WaspSTS"
%windir%\system32\inetsrv\appcmd start site /site.name:"WaspAPI"
%windir%\system32\inetsrv\appcmd start site /site.name:"Wasp_IC"
%windir%\system32\inetsrv\appcmd recycle apppool /apppool.name:"WaspPAPI"
%windir%\system32\inetsrv\appcmd recycle apppool /apppool.name:"WaspPIC"
%windir%\system32\inetsrv\appcmd recycle apppool /apppool.name:"WaspPSTS"
pause
::end code::
============================================================================
Asset & InventoryCloud v2 Installed on the Same Machine
net stop RabbitMQ
REM - stopping Rabbit also stops WaspNowService
net stop Redis
net stop MSSQL$WASPDATA
net stop WASPLaterService
net stop W3SVC
net start MSSQL$WASPDATA
net start W3SVC
net start RabbitMQ
net start Redis
net start WASPLaterService
net start WaspNowService
%windir%\system32\inetsrv\appcmd stop site /site.name:"WaspSTS"
%windir%\system32\inetsrv\appcmd stop site /site.name:"WaspAPI"
%windir%\system32\inetsrv\appcmd stop site /site.name:"Wasp_AC"
%windir%\system32\inetsrv\appcmd stop site /site.name:"Wasp_IC"
::Flush Redis
cd C:\Program Files\Redis-3.0.504-64bit
redis-cli -h 127.0.0.1 -p 6379 -a r3dIkul00zSVmVs flushdb
redis-cli -h 127.0.0.1 -p 6379 -a r3dIkul00zSVmVs flushall
%windir%\system32\inetsrv\appcmd start site /site.name:"WaspSTS"
%windir%\system32\inetsrv\appcmd start site /site.name:"WaspAPI"
%windir%\system32\inetsrv\appcmd start site /site.name:"Wasp_AC"
%windir%\system32\inetsrv\appcmd start site /site.name:"Wasp_IC"
%windir%\system32\inetsrv\appcmd recycle apppool /apppool.name:"WaspPAPI"
%windir%\system32\inetsrv\appcmd recycle apppool /apppool.name:"WaspPAC"
%windir%\system32\inetsrv\appcmd recycle apppool /apppool.name:"WaspPIC"
%windir%\system32\inetsrv\appcmd recycle apppool /apppool.name:"WaspPSTS"
pause
::end code::
If you expose your server to the Internet, we recommend regularly monitoring your server for intrusions and other suspicious activity. Wasp Barcode Technologies can not be held responsible if someone breaks into your server or for any damages incurred.
IIS Logs and other logs can accumulate over time, eventually filling your hard drive. You can find a sample of how you can automatically clean up these logs on your installation media under CommonAppData\Wasp Barcode Technologies\MobileAssetWeb\CleanupLogs.
Many components of the Installation rely on “.bat” files that can be manipulated if necessary, to run successfully on the target server. If this becomes necessary, we recommend users copy the setup to a Hard drive where the .bat files can be edited so the setup can be retried – but only at the direction of our Tech Support.
The Setup is very good about skipping steps that have already succeeded and resuming/retrying the last step that failed.
The setup also documents the installation process in a series of installation logs. These must be shared with Tech Support if problems arise.
Tech Support Details
|
US Toll Free |
Tech Support Numbers: 866-547-9277 option 3 and 214-547-4100 option 3. Web/Cloud License expiration numbers: 866-547-9277 option 2 and 214-547-4100 option 2. On-Premise License Activation (Sales) numbers: 888-536-7067 and 214-547-4100 option 2. |
|
UK |
0845 430 1971 |
|
Website |