Windows Mobile/CE Move
The Move Inventory screen allows you to move inventory quantity for an item from one Location to another. When you create an item, you can add which locations it may be. When you then add inventory (quantity) to the item, you select in which location that quantity will reside. The Move function allows you to move that inventory from the originally assigned location to another. By moving inventory in the software, you can easily keep accurate records of where all of your inventory is currently located.
You can only move inventory that is listed in the system as having a quantity greater than 0 (quantity is added on the Add Inventory screen or when Receiving inventory.)
Tap on the Transactions > Move.
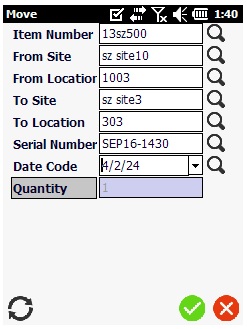
The Move screen will appear.
Moving an Inventory
- Enter/scan the Item Number.
- The Item Description will automatically populate. it is a read only field.
- Enter the From Site and From Location. The From Site and From Location are the Site/Location where the inventory is currently located.
- Enter the To Site and To Location (required). This is the Site/Location to which you are moving the inventory.
- Enter the Serial Number, Date Code.
- Enter the Quantity of inventory you want to move.
- Enter Notes for this transaction.
- Tap on the Move button.
- A message will appear indicating the Inventory is moved successfully.