Locations Lookup
The Location
Lookup lists all locations in InventoryCloud. In this page, you
can view the list of already created locations, add a new location,
edit existing location and delete locations.
Viewing
the Location Lookup Screen
Adding
a Location
Editing
a Location
Deleting
a Location
- Click on the
Lookups > Location.
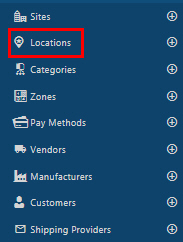
- The Locations
screen will appear.
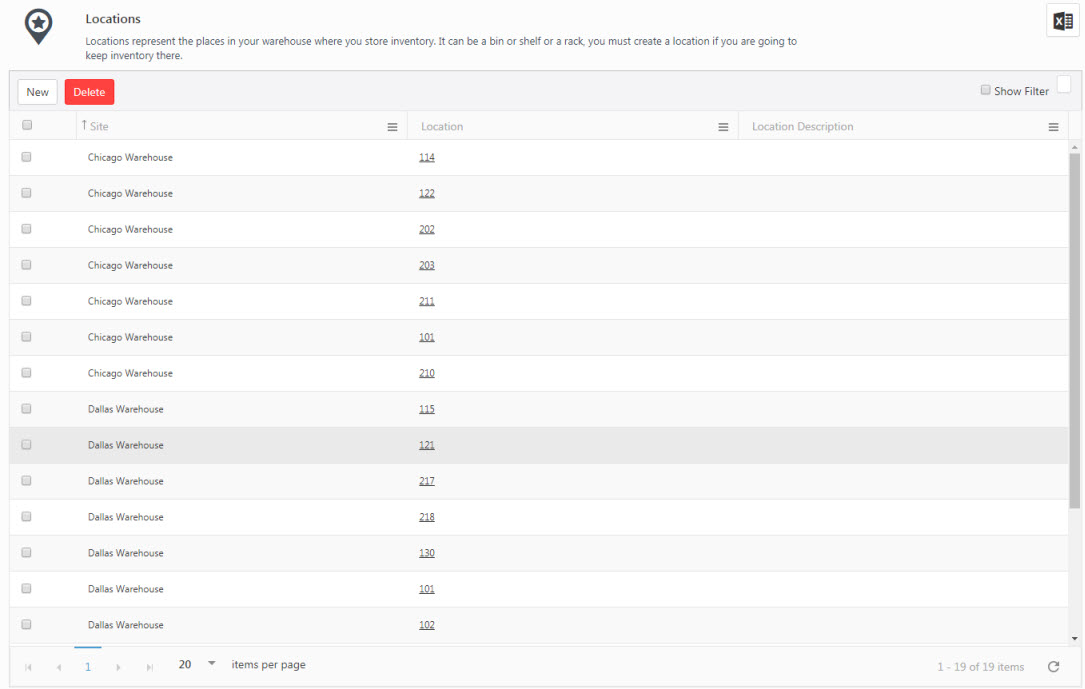
- By default, the lookup page displays 20 items
per page. Scroll through the pages using the navigation buttons at
the bottom of the screen. Change the number of items listed on each
page using the drop down menu.
Note:
You
can change the numbers in the drop down on the Options page.
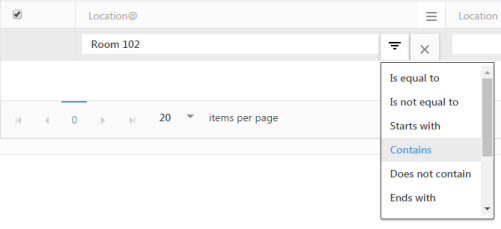
- Show
Filter - When you click on the Show
filter checkbox, a text box will appear under location field
where you can type the search text to find the desired detail.

- Select the modifier by clicking the filter
icon.
- Export
- This option allows you to export the list of
Locations to an Excel spreadsheet. You can export up to 25000 records
and also allows you to customize the list as needed using filters/custom
views/grouping and then export the information to Excel. Filter the
list as needed, then select the Export icon -
 . The report will get downloaded and can be accessed
from the icon at the bottom of the screen. Click on the icon and select Open to view the report. You can save or alter the report
as needed in Excel.
- Print
Location Label - Select the location and click on the Print Location
Label button to print the location label for a particular site.

Location Label for WHSE3

- Click on the Lookups
-> Locations -> New button Or

Click on the Lookups
-> Locations ->  button.

- The New Location
screen will appear.
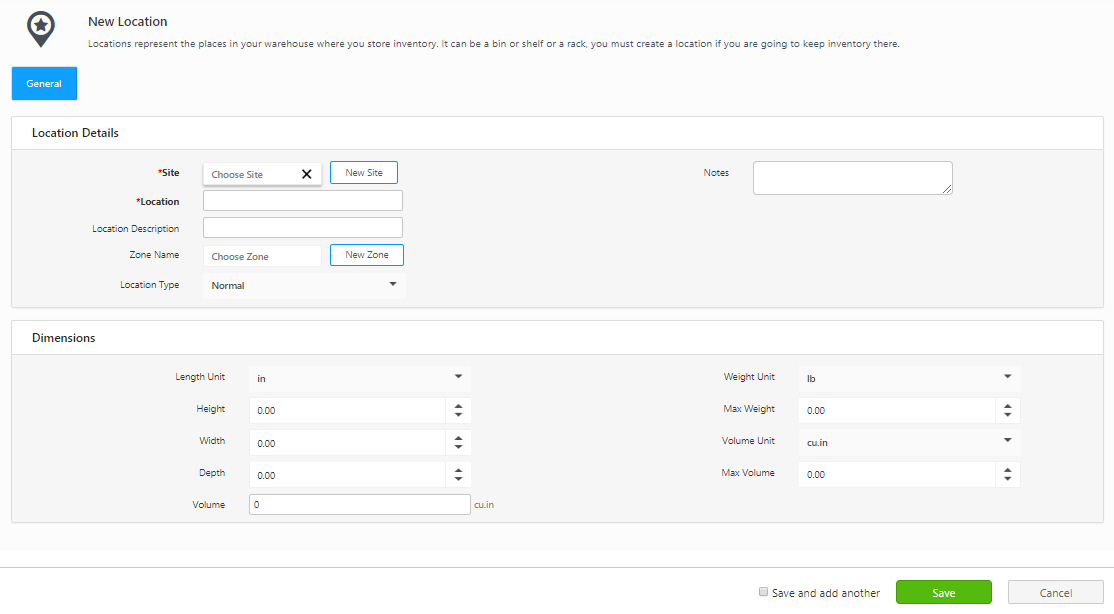
- Location Details
- Site (Required)
- Enter the Site in which
this Location is located.
Enter a partial value in the field. A drop down will appear with departments
matching the entered data. If the site has not yet been added to the
database, click on the New
Site button and it will navigate
to New Site screen under
Lookups.
- Location (Required)
- Enter the Location name.
This name must be unique within the Site.
- Location Description
- Enter a brief description of this site. This is useful when the
Location value is cryptic
(For example, Location "A7B2" could be described as "Aisle
7 Bin 2".)
- Zone Name
- If you want to include this location in a zone (a group of locations),
select the zone name or add a new zone by clicking on the New Zone
button. Add the Zone name and click on the Save
button.

- Location Type
- Select the location type. Options are: Normal, Pick Only, Receive
Only and Repair/Inactive.
- Notes
- This text field is available to
record any additional information you might have about this
Location.
- Dimensions
- Select the Weight Unit.
- Enter the values in the Height, Width
and Depth field.
The Volume in the Volume
field will get calculated based on the values entered in the Height,
Width and Depth field.
- Select the Max Weight Unit. Enter the
Max Weight.
- Select the
Volume Unit. Enter the Max Volume.
- Click on the Save
button.
- If you want to create another location, click
on the Save and Add another
checkbox before clicking on the Save
button. In this case, the New Location screen will appear once you
click on the Save button.
- A message will appear indicating that the location
is created successfully.
- Click on the Lookups
-> Locations. The Locations screen will appear.
- Click on the Location
Number link.

- The screen will navigate to View/Edit Location
screen.
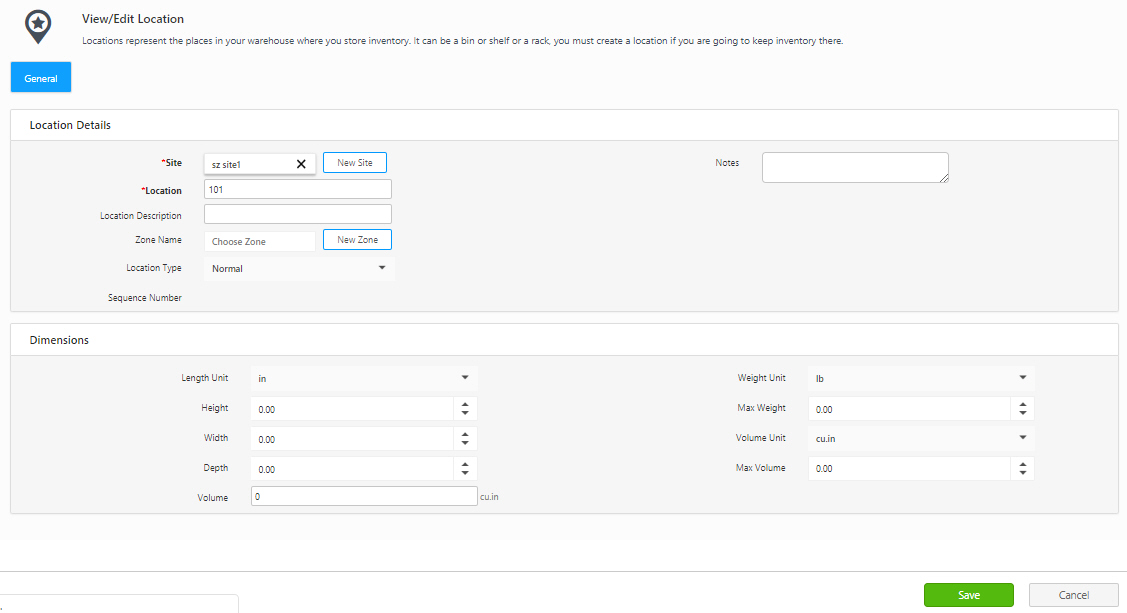
- You can edit the Location details and Dimensions.
- Click on the Save
button.
- A message will appear indicating that the location
is updated successfully.
- Click on the Lookups
-> Locations. The Locations screen will appear.
- Select the Location and click on the Delete
button.
- A pop-up message will appear asking for confirmation.
- Click on the Delete
button again.
- A message will appear indicating that "1
Location is deleted successfully".


 button.


