Vendors Lookup
The Vendor Lookup lists all vendors created in InventoryCloud. From this page you can view, add or delete vendors.
View Vendors Lookup
Click on Lookups -> Vendor.
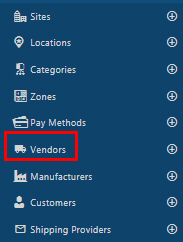
The Vendor screen will appear.

By default, the lookup page displays 20 items per page. Scroll through the pages using the navigation buttons at the bottom of the screen. Change the number of items listed on each page using the dropdown menu.
Note: You can change the numbers in the dropdown on the Options page.
The Vendor screen has the following functionalities:
- New - Click on the new button to add a vendor. Refer to the topic Add a Vendor or New Vendor.
- Edit Link - The vendor name link allows you to edit the information. Refer to the topic View/Edit a Vendor.
- Delete - The delete button allows you to delete vendors. Refer to the topic Delete a Vendor.
- Show Filter - When you click on the Show filter checkbox, a text box will appear below each column header. In these text boxes, you can input your search criteria to locate the specific information you're seeking.

- Export (
 )- This feature enables you to export the listed vendors to an Excel spreadsheet. It can export up to 25000 records. Customize the list according to your requirements using the filters option. Once you've filtered the list to your satisfaction, click on the Export icon. This will initiate the download of the report. In most web browsers, you can access the downloaded file through an icon at the bottom or edge of the browser window. For further guidance on locating your downloaded files, please refer to your browser's help resources. You can then save or modify the report as necessary within Excel.
Add a Vendor
- Click on Lookups -> Vendor -> New button Or click on Lookups -> Vendor ->
 button.
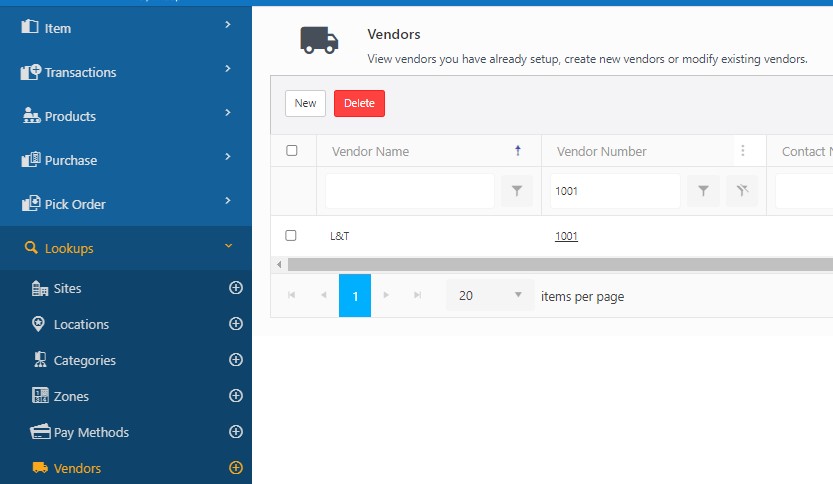
- The New Vendor screen will appear.
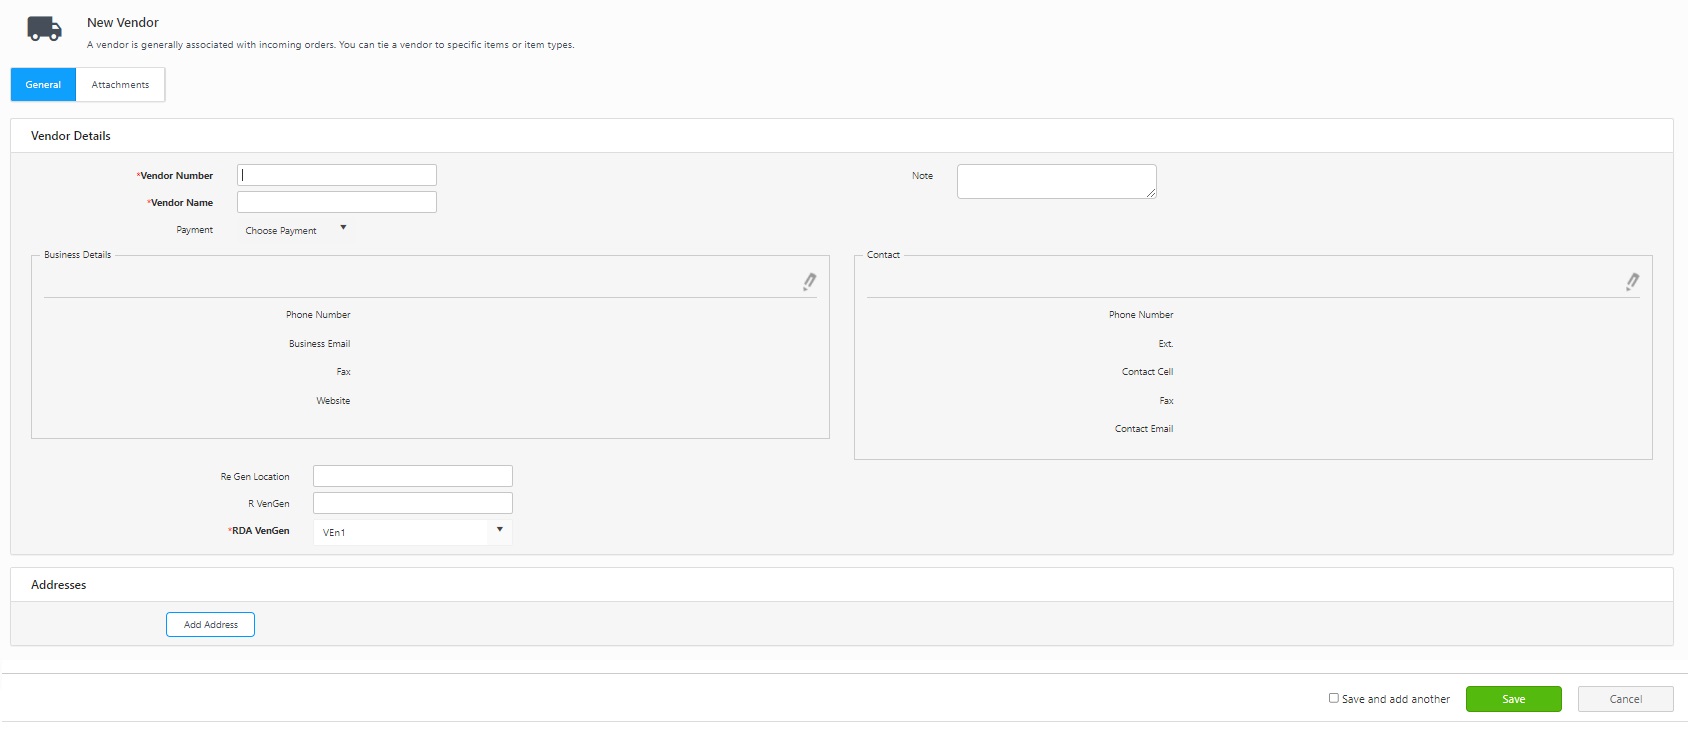
- General Tab
- Vendor Number - (Required) Enter a unique identifier for this vendor.
- Vendor Name - (Required) Enter a name for this vendor.
- Payment - Select the Payment option. The payment option will be automatically pulled once the user selects the vendor on the Purchase order page.
- Enter the Note if required.
Business Details
- Click on
 to enable the fields.
 - Add phone number, business email, fax, and website details.
- Click on the Update button. Use Cancel to discard the modifications.
Contact Information
- Click on
 to enable the fields.
 - Enter the phone number and extension (Ext.), contact cell, fax, and contact email.
- Click on the Update button. Select Cancel to close the fields without saving any changes.
Addresses
- You can add multiple addresses. Click on the Add Address button.
- The address-related field will appear.

- Select the type of address in the address type field. The options are vendor billing and vendor shipping.
- Enter the address information in the fields provided.
- Click on the Update button. Use Cancel to discard the modifications.
- Click on the Add Address again to add another address.
To edit an address, click on the ![]() . Make the required changes and click Update.
. Make the required changes and click Update.
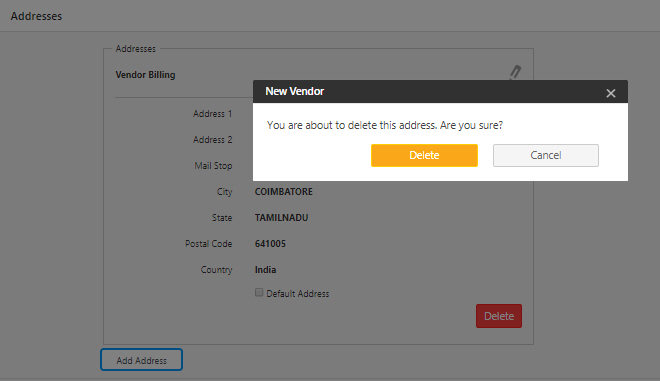
To delete an address, click on the Delete button. A confirmation screen will appear. Click on the Delete button again.
- Attachment tab
- Click on the Attachment tab. To attach files, click on the Attach Files button.
- Click on the Select Files button. Browse and select the file. Click on the Attach button.

- The attached file will appear as shown below.

- The file name can be edited by clicking on the Edit button. Edit the name and click Update.

- To delete an attached file, click on the Delete button.

- Custom Fields - Enter the information required in the Custom Fields.
- Click on the Save button. If you want to create another vendor, click on the Save and Add another checkbox before clicking the Save button. In this case, the New vendor screen will appear once you click on the Save button.
- A message will appear, indicating that the vendor is created successfully.
Delete Vendors
- Click on the Lookups -> Vendors.
- Select the Vendor and click on the Delete button.
- A pop-up message will appear asking for confirmation.
- Click on the Delete button again.
- A message will appear indicating that "1 vendor is deleted successfully".
View/Edit Vendor
- Click on the Lookups -> Vendors. The Vendor screen will appear.
- Click on the vendor number. It is a link.

- The View/Edit Vendor screen will appear.

- Edit the required fields. You can refer to Adding a New Vendor topic.
- Click on the Save button. A message will appear, indicating that the site is updated successfully.