Add Inventory
The Add Inventory screen allows you to add quantity to items already entered into your database. Inventory is the amount or quantity of a particular item. Items must first be imported or manually entered on the Add Item screen before adding quantity to them.
Note that if you want to increase the inventory amount for Assembly Items, you should use the Build Assembly feature rather than the Add feature. Build Assembly will adjust the inventory amount for all component items. You can use the Add feature if you want to add inventory to the Assembly Item only without changing the inventory amount for the component items. Use the Add or Receive for cases where no component items were consumed, like the item being returned or refurbished, or if the item is delivered pre-assembled by another manufacturer.
Inventory can also be added on iOS and Android devices.
Site-Item/Category Restrictions on the Add Transaction
Adding Inventory
Select Transactions > Add.
![]()
The Add Inventory screen will appear.
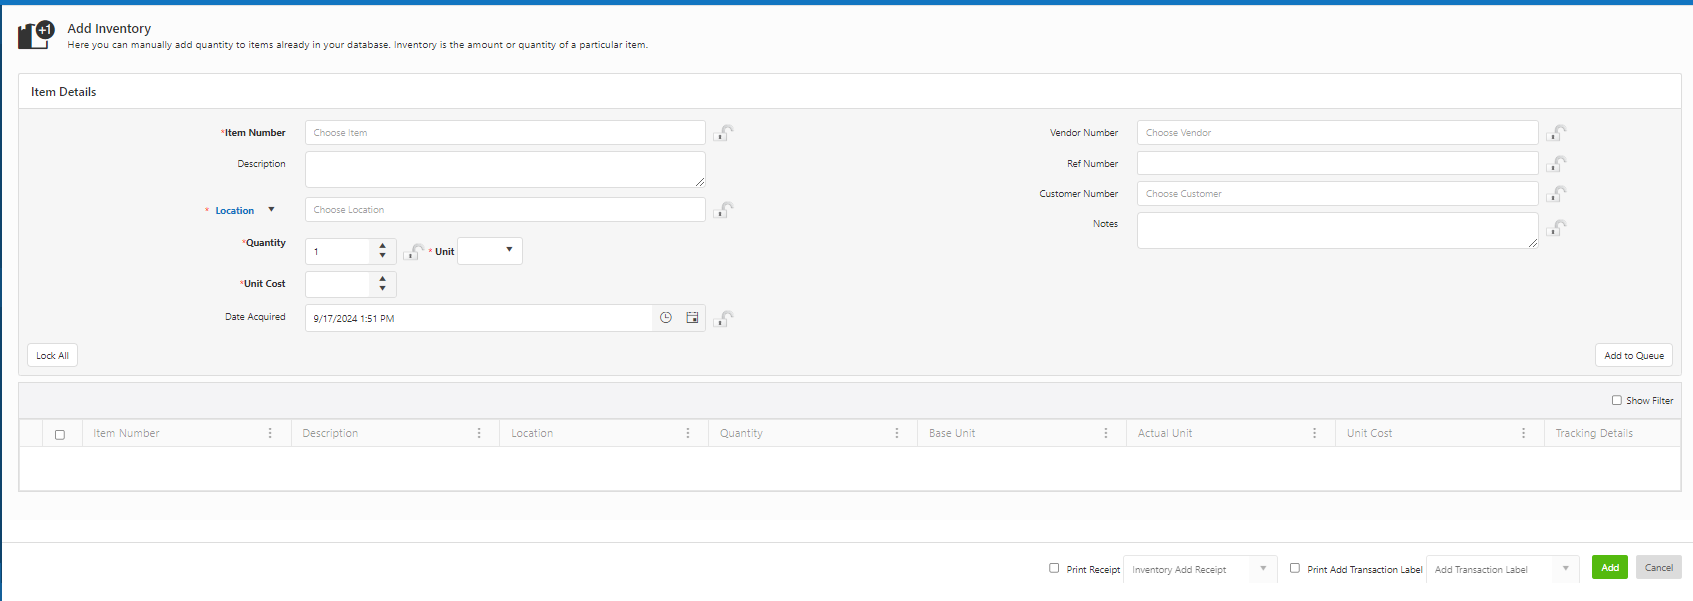
Item Details
Note: Several fields in this section can be "locked". When a field is locked, it will retain the information you entered through subsequent transactions. This is useful if you are adding multiple items to a location or checking out multiple items to a single customer. To lock an individual field, click on the lock icon. You can select the Lock All button to quickly lock all fields that have the icon. Select Unlock All to unlock the fields, allowing you to add new information. Click here for information on how to Lock fields.
- Choose/enter the Item number to which you want to add inventory (required).
- The Description field will automatically populate if the description is added while adding the inventory.
- Choose Location/Container from the dropdown and select the location/container to which you want to add quantity for this item (required). Note: The container feature is scheduled for a future release.
- The location field will display the site and location name when hovered over with the mouse. Likewise, hovering over a selected container will show the site, location, container type, and container ID.
Location
![]()
Container
![]()
- The location/container field is an autocomplete dropdown for selecting either locations or containers. If "Container" is selected and no containers match the search (with a non-empty query), the dropdown automatically switches to search for locations. The same logic applies when "Location" is selected. The field name updates dynamically between "containers" and "locations" based on the search results.
- In the location dropdown, the site and location information are displayed. In the container dropdown, the site-location-container ID is shown.
![]()
- Enter the Quantity you want to add to this item (required). Note: The quantity will be 1 if this item is tracked by serial number.
- The Unit Cost will populate when you select an item. You can change this amount if needed.
- Select the date and the time when the quantity was acquired. This date defaults to the current date.
- Choose the Customer and Vendor. Enter the Reference number and/or Notes for this transaction (Optional).
- If this item has trackbys set, a button labeled Tracking Details will appear. Refer to the topic - Tracking Details.
![]()
- When you are done entering information, click on the Add to Queue button. The added inventory will appear in the bottom grid.

Note that the location column will display the site and location name when hovered over with the mouse. Likewise, hovering over a selected container will show the site, location, container type, and container ID.
![]()
- To update the added inventory details, click on the item in the bottom grid. The Item Details will get populated. Make the changes and click on the Update button.
![]()
- Print Receipt & Print Add Transaction Label Checkbox - click on the checkbox to print the receipt and /or to print the transaction label for the newly added inventory. If you want to change the receipt header name and/or transaction label header name, enter the name in the text box next to the checkbox. Note: In case the pop-ups are blocked and you are unable to view the print receipt, Refer to the topic - Popups and Redirects to allow pop-ups and to view the print receipt.
![]()
- Click on the Add button. Note: Make sure all transactions that you want to process are selected in the list before clicking the Add button. Only selected transactions will be processed.

- The Receipt and the Transaction label will open in a new tab once the inventory is added.
Receipt
![]()
Transaction Label
![]()
Site-Item/Category Restrictions on the Add Transaction
If the “Site-Item/Category filter” or “Working Site and Site-Item/Category filter” is applied, then the item number dropdown on the Add transaction page will display the items based on the selected Working Site and selected Site-Item/Category filter. The same is applicable for the location field as well.
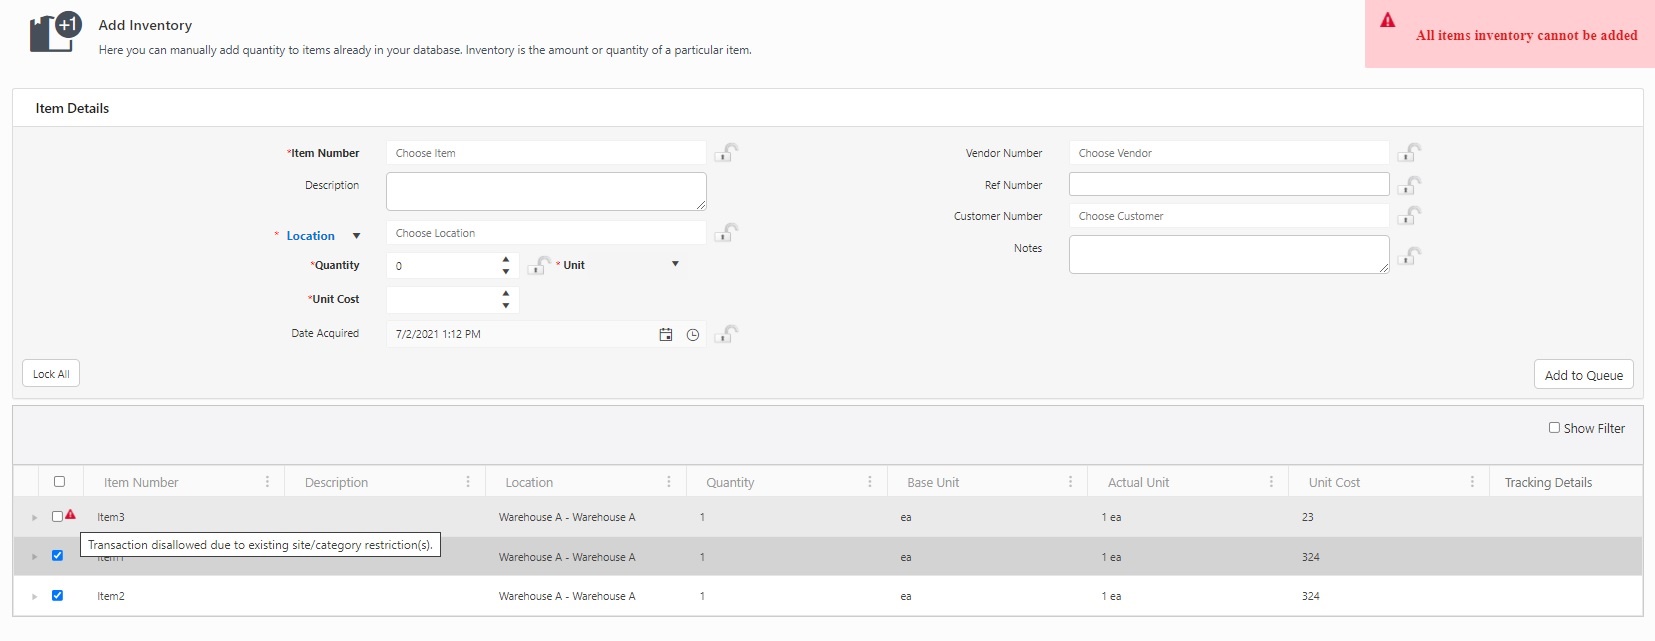
If the Site-Item/Category Restrictions are applied after adding the items in the queue, then on adding, a message will appear indicating that all inventory items cannot be added. The item that cannot be added will have a warning message indicating that "Transaction disallowed due to existing site/category restrictions”
Also, refer to the topic Site-Item/Category Filtering on the Edit Site page and Working Site for more details.