Check Out
The Check Out screen allows you to check out, or assign, inventory to customers or vendors for a specified length of time. Checking out inventory decreases the quantity of the item you have on hand but does not remove the inventory from your database (since it is assumed the inventory will be checked back in). The check-out function is useful if you lease equipment to customers or need to loan out inventory temporarily.
You can only check-out the inventory that has been added. This means that when you create an item, you must add the quantity of inventory to be checked out to a customer or vendor. You can add inventory in Add Inventory or Receive Inventory screen.
Site-Item/Category Restrictions is not applicable for Checkout transaction.
Check Out Inventory
Select Transactions > Check Out.
![]()
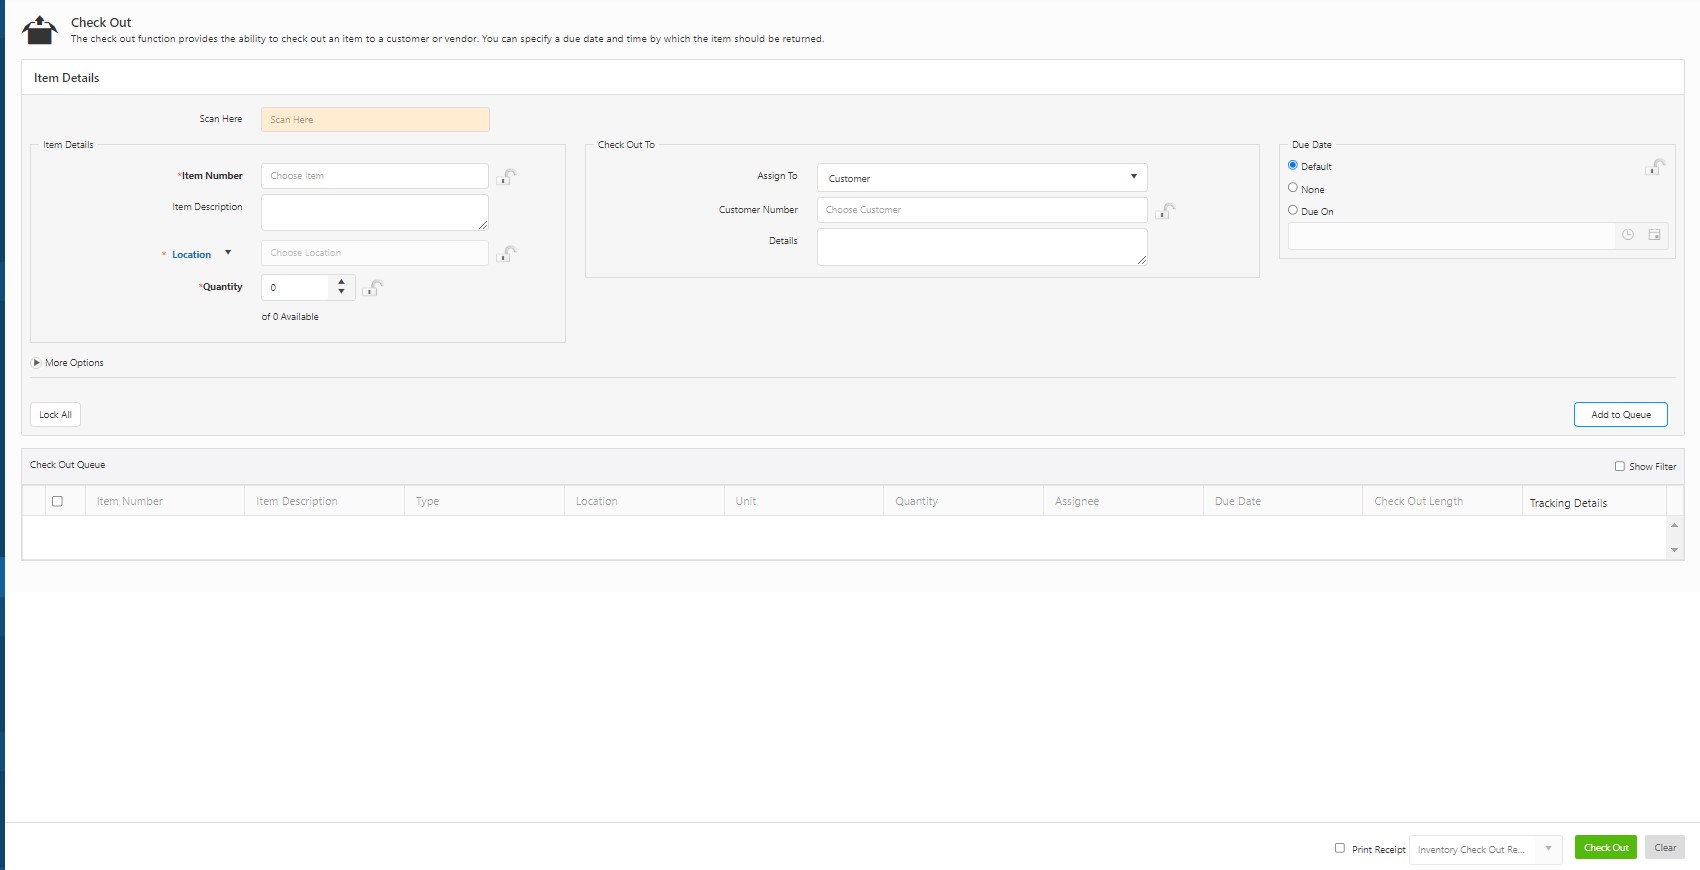
The Check Out screen will appear.
Note: Several fields in this section can be "locked". When a field is locked, it will retain the information you entered through subsequent transactions. This is useful if you are adding multiple Items to a location or checking out multiple Items to a single customer. To lock an individual field, click on the lock icon. You can select the Lock All button to quickly lock all fields that have the icon. Select Unlock All to unlock the fields, allowing you to add new information.
Using Scan Here to fill in the details
- Scan Here: Click on the Scan Here field and then scan an item number, location, and/or customer/vendor. You can type in a full or partial vendor/customer number or an item number to perform a search. The Scan Here field works as a Quick Lookup.

Manually Entering the Details: Enter all the details manually in all the fields.
Note: Please be aware that sometimes, when you enter details in all the fields, sometimes the item will automatically move to the Check Out Queue. To update any of the details, click on the line item in the Check Out Queue and the information will populate in the top section.
- Choose an item number from the drop-down options. You can either type full or partial information to choose the item number.
- The description field will automatically populate if you have added a description while adding the inventory.
- Choose Location/Container from the dropdown and select the location/container. Note: The container feature is scheduled for a future release.
- The location field will display the site and location name when hovered over with the mouse. Likewise, hovering over a selected container will show the site, location, container type, and container ID.
Location
![]()
Container
![]()
- The location/container field is an autocomplete dropdown for selecting either locations or containers. If "Container" is selected and no containers match the search (with a non-empty query), the dropdown automatically switches to search for locations. The same logic applies when "Location" is selected. The field name updates dynamically between "containers" and "locations" based on the search results.
- In the location dropdown, the site and location information are displayed. In the container dropdown, the site-location-container ID is shown.
- Enter the quantity of the Item that you want to check out. The total checked-out units will appear next to the Quantity field.
- Tracking details button will appear if the selected item is tracked by serial number, date code, or lot. Refer to the topic - Tracking Details.
Check Out To
Note: You can also use the Scan Here field to search for a Customer or Vendor
- Assign To - You can assign the item to a customer or vendor.
- Customer Number / Vendor Number - Enter the customer/vendor number. Refer o the topic - Warning in the Check Out screen, when you select the vendor number during re-checkout.
- Enter notes in the Details section (optional).
Due Date - Select the due date. Refer to the topic Default CheckOut Due Type settings to set the default checkout due type.
- Default - The default option means that the due date is based on the checkout length set for the selected item. You can select this option if you are checking out multiple items to a customer with different checkout lengths and due dates.
- None - There will be no due date for any item included in this transaction.
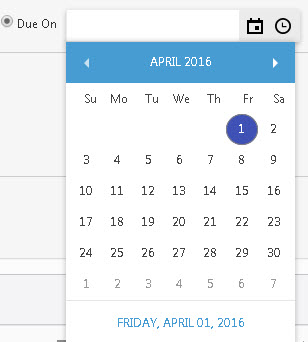
- Due On - Select a custom due date using the calendar and time icons.
- If you want to add notes to this transaction, click More Options. The notes field will appear to add the required notes.
- When you have finished entering information, click on the Add to Queue button.
- The item will move to the Check Out Queue. Note that the items are not checked out yet.
- To update any of the details in the Check Out Queue section, click on the line item to be updated. The selected item will be highlighted in blue color and the details related to the item will populate in the Item Details section. You can update the required details and click on the Update button.
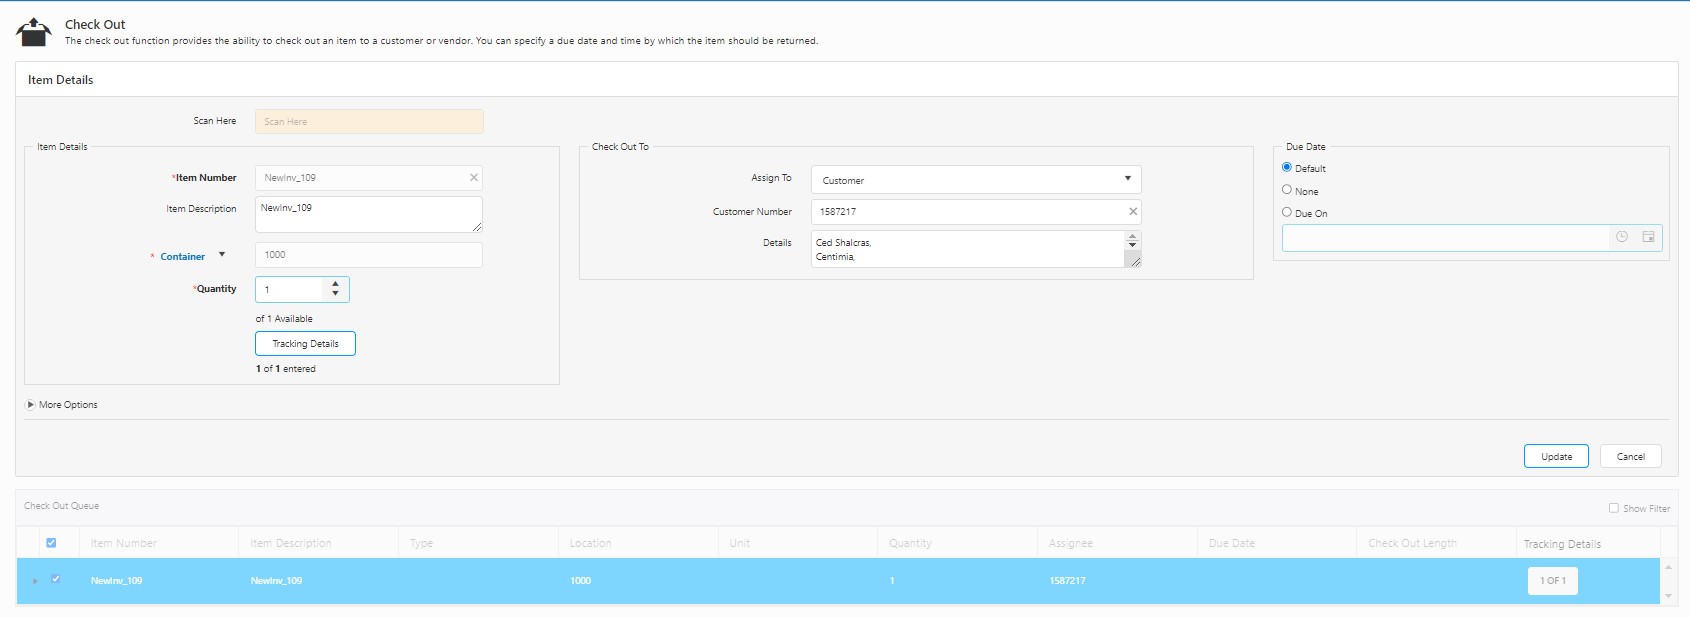
Note that the location column will display the site and location name when hovered over with the mouse. Likewise, hovering over a selected container will show the site, location, container type, and container ID.
![]()
- You can continue adding items to the queue as needed.
- When you have finished adding items, make sure you select all items that you want to check out in the Check Out Queue. Important: You must select the items you want to check out in the Check Out Queue. Items in the Queue are selected by default.
- Select Print Receipt if you want to print out a receipt for this transaction. Note: In case the pop-ups are blocked and you cannot view the print receipt, refer to the topic - Popups and Redirects to allow pop-ups and to view the print receipt.
- Click on the Check Out button when you are ready to complete the transaction.
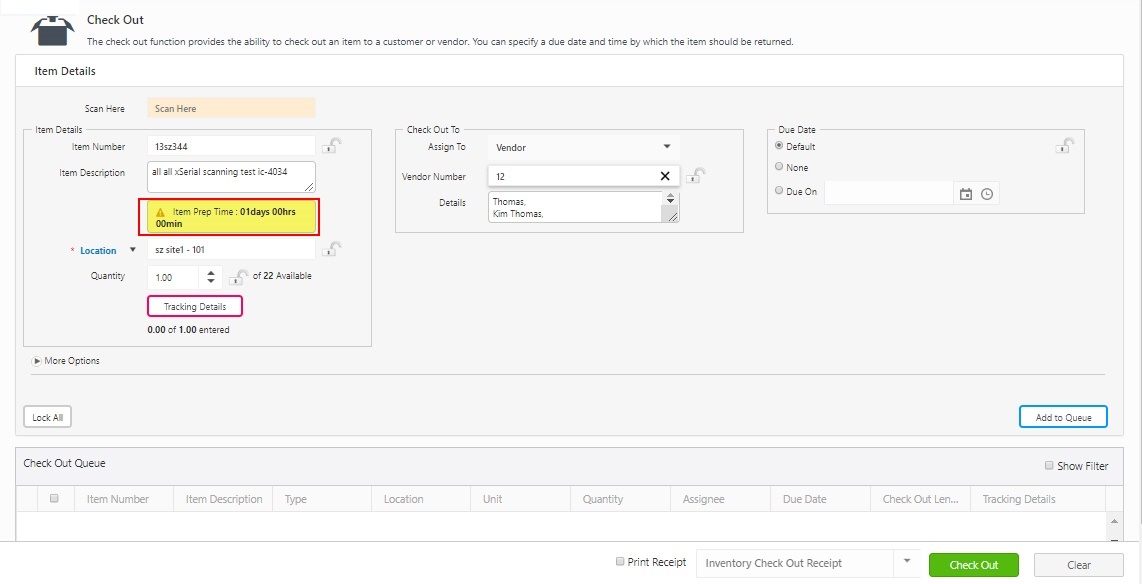
Warning in the Check Out Screen
If you try to re-check out an item, the "Item Prep Time" warning appears below the item details section. The vendor's prep time is set for an item on the New Inventory -> Vendor screen.
Example - Consider you have added a new inventory Item 13sz344, quantity is 22, vendor number is 12, and lead time is 1 day. Suppose you have checked out 22 items to vendor number 12 and then immediately checked in 22 items to the same vendor. Now if you try to check out the same item again, you will get a warning indicating that "Item Prep Time is 1 day 00 hrs 00 min".