New Pick Order
Pick orders can be created in InventoryCloud and emailed directly to your Customer or printed for faxing or mailing.
Also, refer to Ordering Settings to turn on or off the pick order-related settings.
Creating a New Pick Order
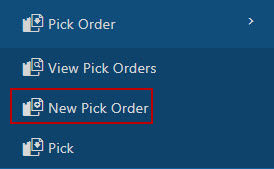
- Click on Pick Order > New Pick Order.
- The New Pick Order screen will appear.
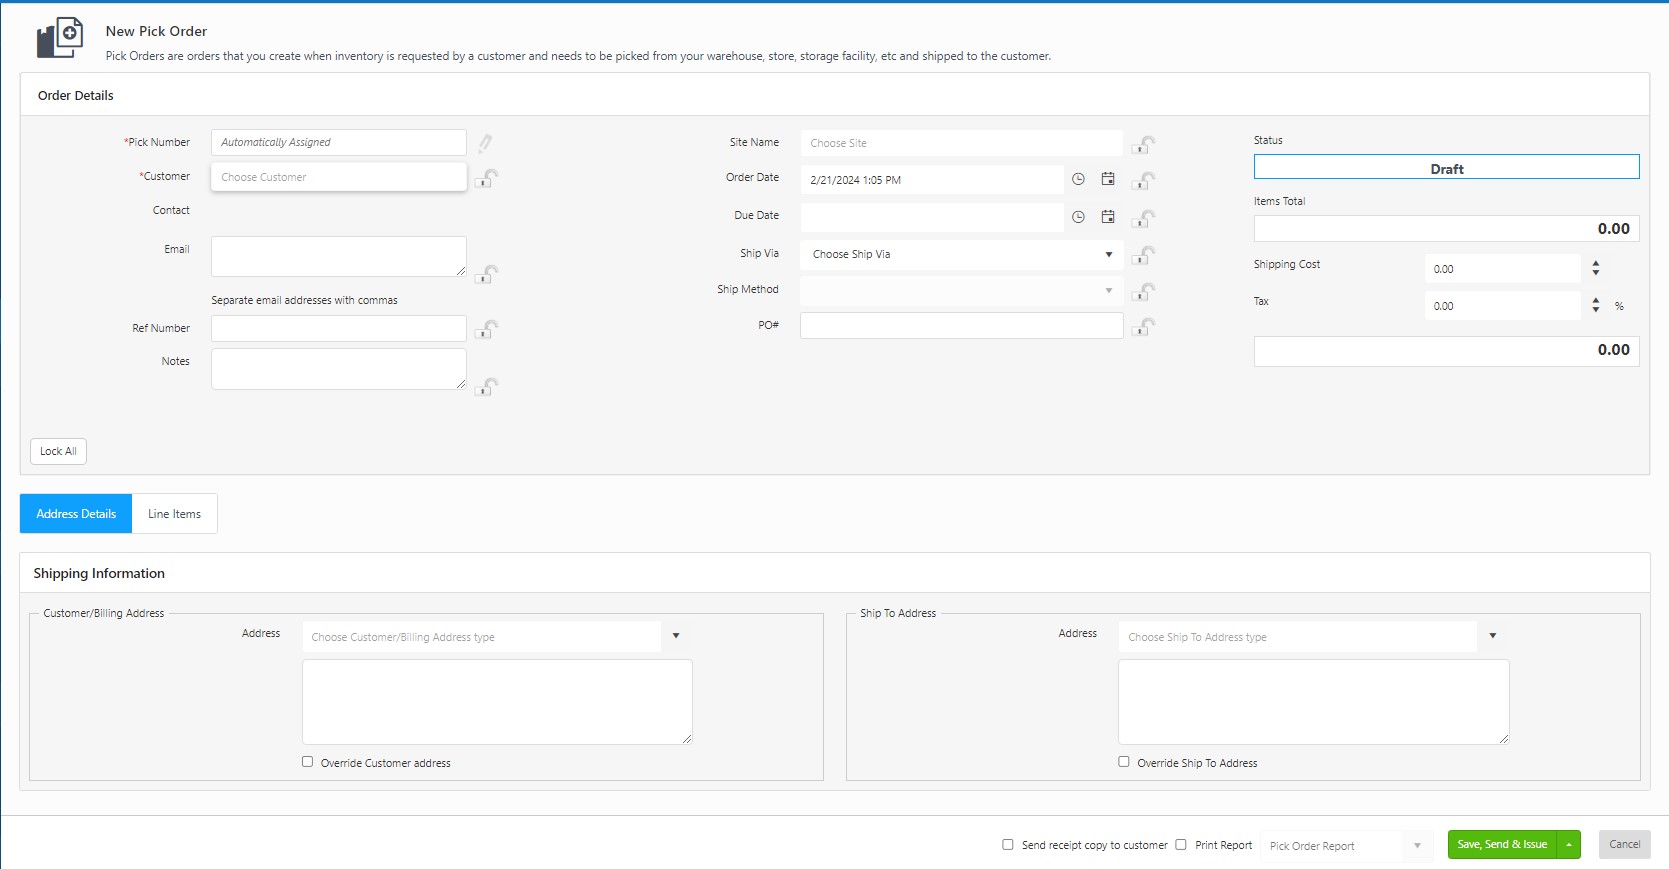
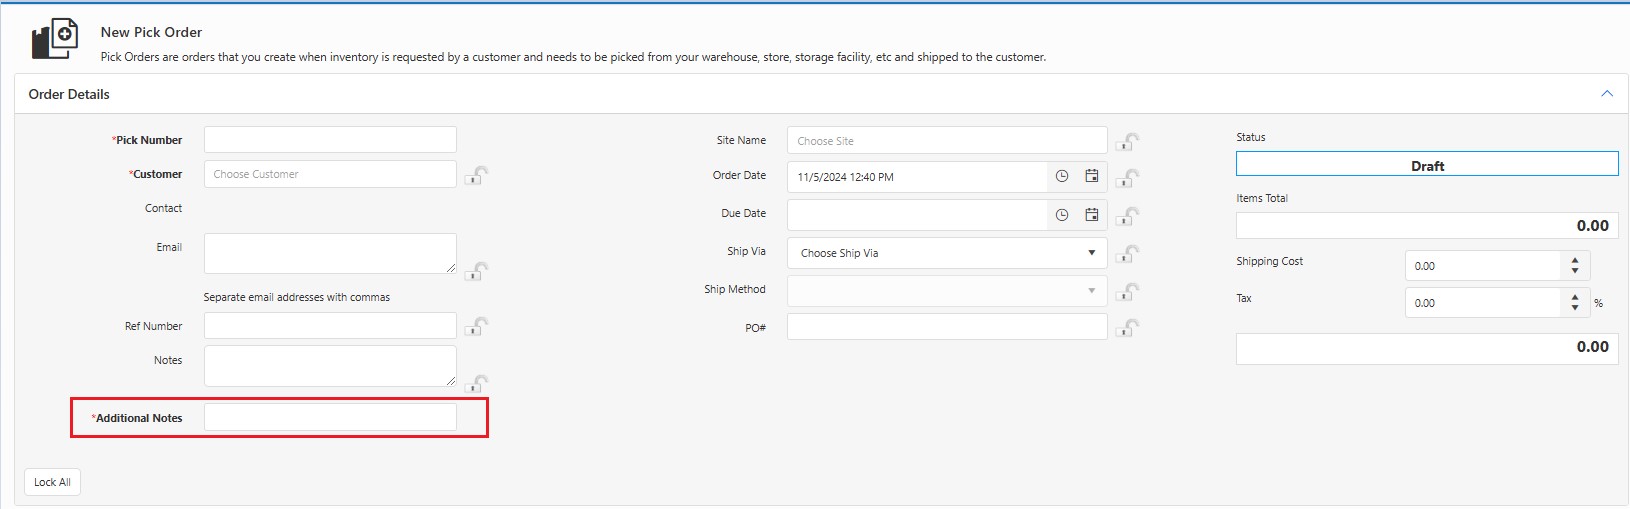
Order Details
- Pick Number - Enter a Pick Number for this new order. If you have set up InventoryCloud to generate pick order numbers automatically, the field will display "Automatically Assigned," as shown in the above image. Each pick order is assigned a unique identifier consisting of an alpha-numeric value of up to 30 characters. This number can be manually entered each time you create a new order or create a template that the software will use to generate a number for you automatically. Create the template using the Number Series screen. You can edit an automatically assigned number if needed.
- Customer - Choose the customer.
- Email - Enter the email address. It supports multiple email addresses. Separate individual email addresses with commas.
- Ref Number - Enter a reference number for this order in the Ref Number field.
- Notes - You can enter notes for this order in the Notes field.
- Order Date - The Order Date defaults to the current date. Change the date by clicking the Calendar icon.
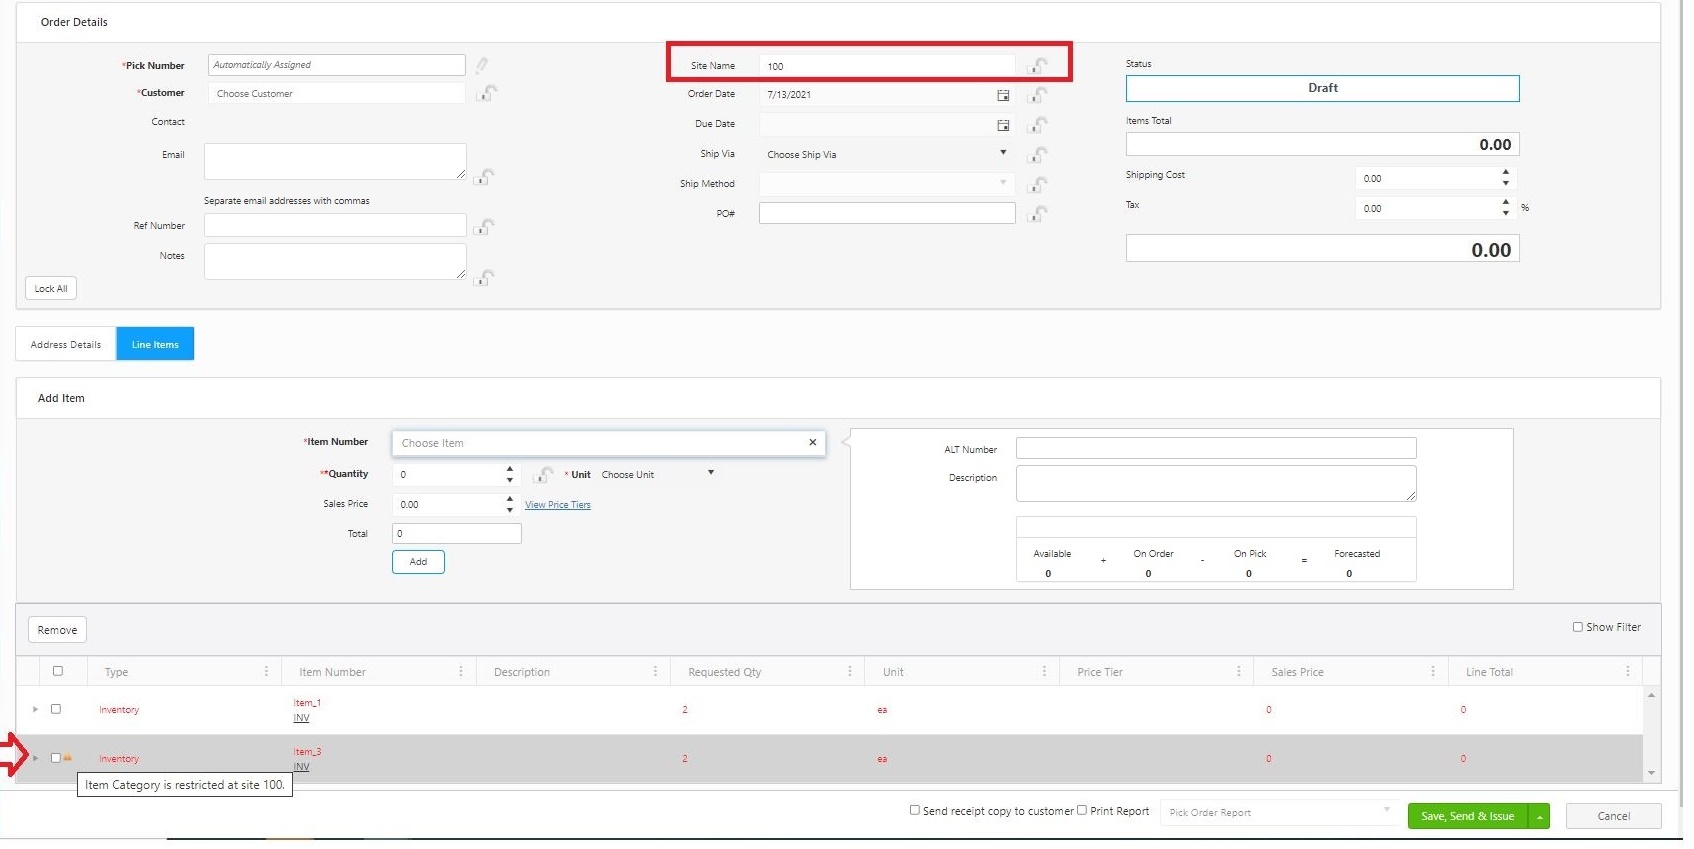
- Site Name - Select the Site. This is optional, but when creating a pick order, you can associate the order with a site. With site restrictions and assigning orders to a site, the user will only see pick orders for their site. For example, a user with access to site A will not see Site B's pick orders when they pull up their orders to pick. The pick order will show for all sites if it is not designated for specific sites. Also, refer to Committed-Order qty in the Edit Inventory Item screen.
Note: The newly created site will not appear in the site field till an inventory is added to that newly created site. Using Form Customization, you can make the Site field mandatory or required field.
Note: While placing a new pick order, if the selected site name has Site-Item/category restriction, then the Item Number field will display the items that are not associated with any category and the items that are associated with the category selected in the Site-Item/category restriction. If there is already an item in the queue that does not fall in the current Site-Item/category restriction, a warning message will appear indicating that "Item-Category is restricted at the selected site.”
- Due Date - Enter a due date for this pick order by clicking the Calendar icon.
- Ship Via - Select a shipping provider from the dropdown list. Shipping Providers can be added on the New Shipping Providers screen.
- Ship Method - The Ship Method dropdown list populates based on the Shipping Provider selected.
- PO# - Enter the Pick Order number.
- Status - This status message changes based on the pick order's current status.
- Items Total - This field provides a total for all items added to this PO (items are added on the Line Items tab.).
- Shipping Cost - Use the up and down arrows to add the shipping cost.
- Tax - Use the up and down arrows to add tax percentage to this pick order.
Note: Several fields in this section can be "locked." When a field is locked, it will retain the information you entered through subsequent transactions. This is useful if you add multiple items to a location or check out multiple Items to a single customer. To lock a particular field, click on the lock icon. You can select the Lock All button to quickly lock all fields with the icon. Select Unlock All to unlock the fields, allowing you to add new information. Refer to Locking Fields.
- Custom Fields - Enter the information in all the custom fields, if any. The custom fields on the purchase order screen are added through the Form customization screen.
Address Details tab
The pick order can be created without the address details. Use the Form Customization option to make the address field mandatory/required.
- Customer Billing Address - Select the address type from the Address dropdown menu. The options listed in the menu are populated from the information entered on the New/Edit Customer screen. The selected address appears in the text field. You can change this address by clicking the Override Address checkbox.
- Ship To Address - Select the address type from the Address dropdown menu. The options listed in the menu are populated from the information entered on the Company Details screen. The selected address appears in the text field. You can change this address by clicking the Override Address checkbox.
Line Items tab
- Click on the Add Items button.
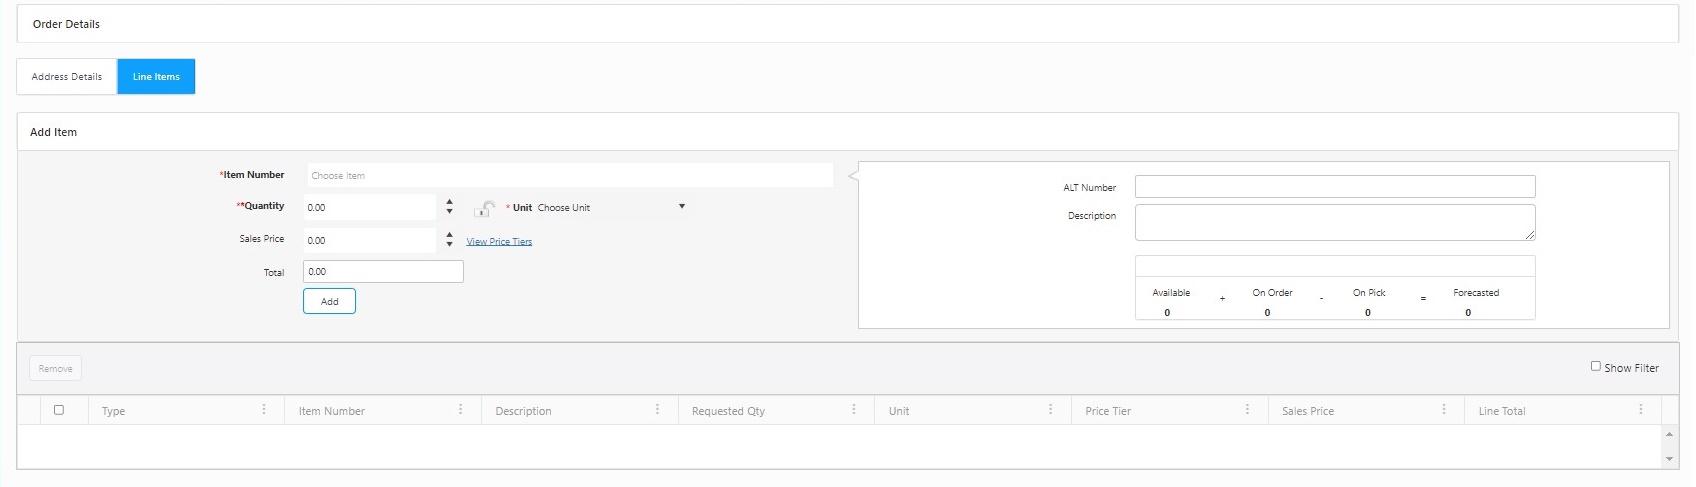
- Item Number (required) - Enter the item number you want to add to this pick order in the Item # tab.
- Quantity (required) - Enter how many of the items you want to order.
- Unit (required) - Enter the unit type you want to order.
- Sales Price - The price will populate based on information entered for the item (on the New/Edit Item screen). The price can be edited as needed.
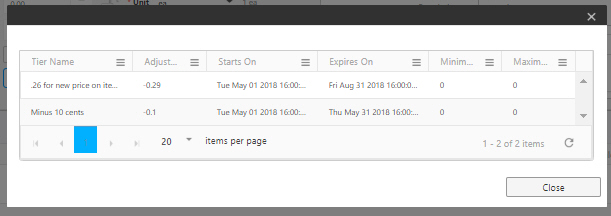
- You can click on the View Price Tiers link to view the price tiers
- Total - The total will calculate based on the Quantity/Unit and Price.
- ALT Number/Description - The Alternate Number and Description populate from information entered for the item (on the New/Edit Item screen).
- Available/On Order/On Pick/Forecasted - These fields reflect quantity levels for the selected item.
Note: Forecasted = Available + On Order - On Pick.
- When you are done adding information, click the Add button. The item will appear in the list at the bottom of the screen.
- To update any of the added Item details, click on the line item to be updated. The selected item will highlight in Blue, and the details related to the item will populate in the top grid. You can update the required details and click on the Update button.

- Remove the item from the pick order by selecting the checkbox in front of the item, then click the Remove button.
- Click on the Send Receipt copy to customer checkbox to send the receipt and/or Print Report checkbox (if required) to print the new pick order. Note: In case the pop-ups are blocked, and you are unable to view the print receipt, refer to Popups and Redirects to allow pop-ups and to view the print receipt.
- Click on the Save, Send, and Issue button when you are done entering information (You can also save it as a draft by clicking on the Save as Draft button. This button appears when you click on the dropdown button next to the Save, Send and Issue button.) The order will be sent to the email indicated on the pick order and will appear in the View Pick Order list with an Open - Pick Order Issued status.

Note: Keep in mind that the order cannot be edited after selecting the Save, Send and Issue button. If you want to edit the order later, select the Save as Draft option by clicking on the dropdown next to the Save, Send and Issue button. Draft orders can be accessed from the View Pick Orders screen.
View/Edit Pick Order
- Click on Pick Order -> View Pick Order.
- Click on the Pick Number link.

- The View/Edit Pick Order screen will appear.
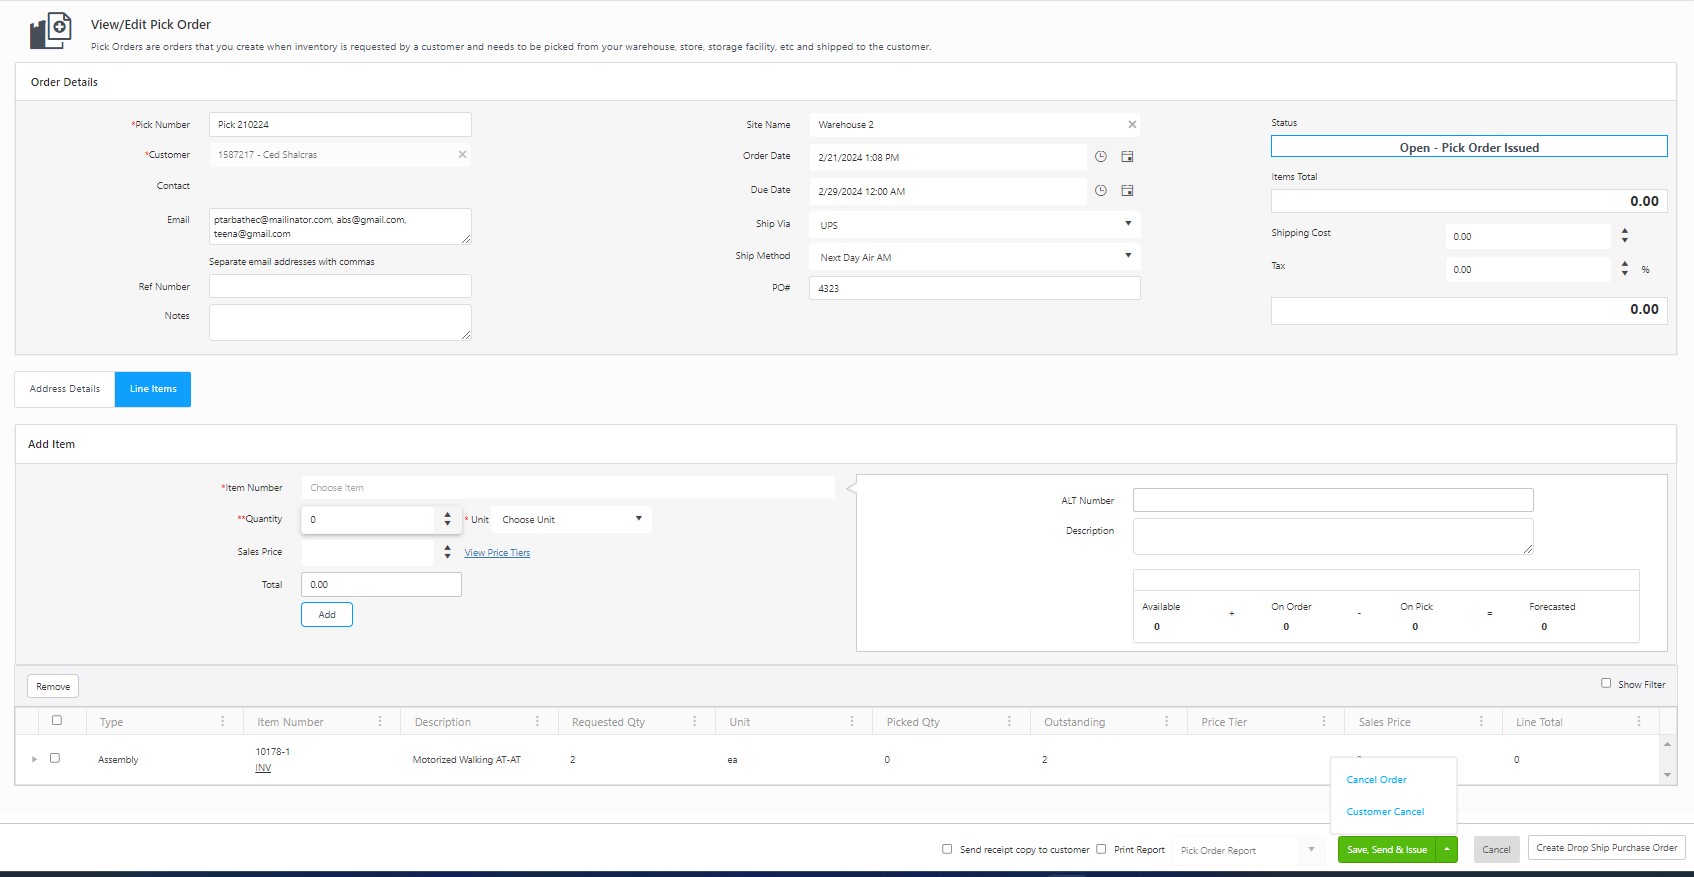
- Edit the fields. Refer to Creating a Pick Order.
- Click on the Send Receipt copy to customer checkbox to send the receipt and/or Print Report checkbox (if required) to print the new pick order. Note: If the pop-ups are blocked, and you cannot view the print receipt, Refer to Popups and Redirects to allow pop-ups and to view the print receipt. Click on the Send Receipt Copy to Customer checkbox to send a copy of the receipt to the customer.
- Click on the Save, Send, and Issue button.
- The Pick Order can be cancelled using the Cancel Order button or the Customer Cancel button. Cancel Order cancels the order. Customer Cancel is used when the customer cancels the order.
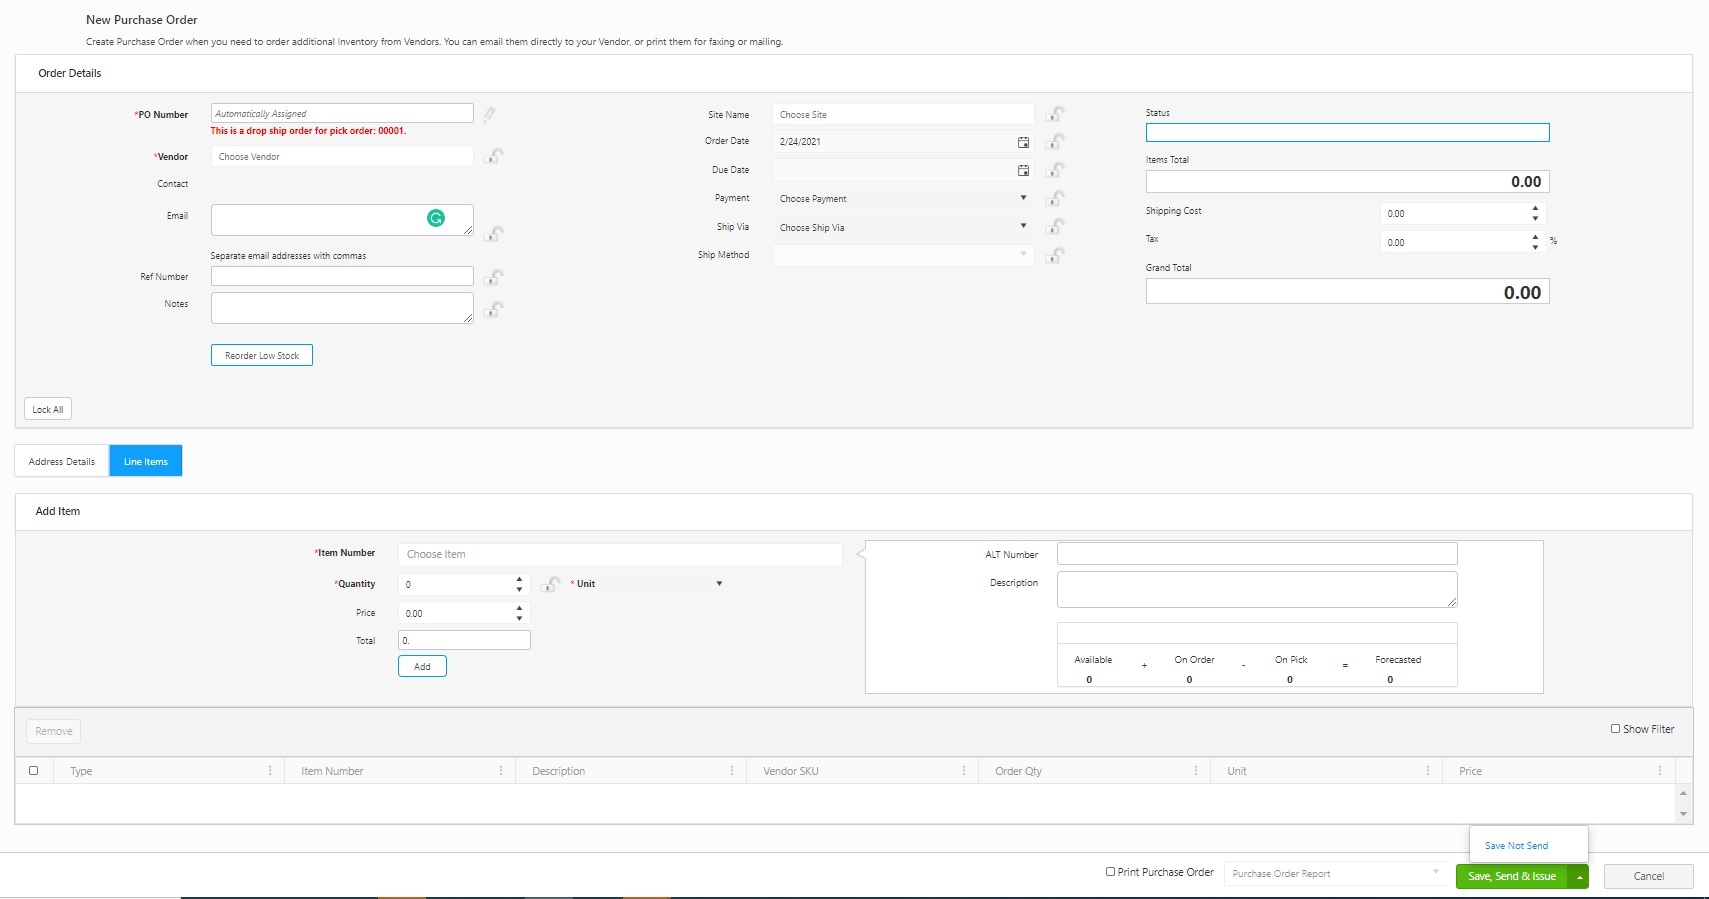
Create Drop Ship Purchase Order
This button will appear if the Drop Ship option is On in Settings > Order (Allow Drop Ship). A drop ship order can be created anytime.
- You should select at least one line item before you create a drop ship purchase order. Select a line item or items.
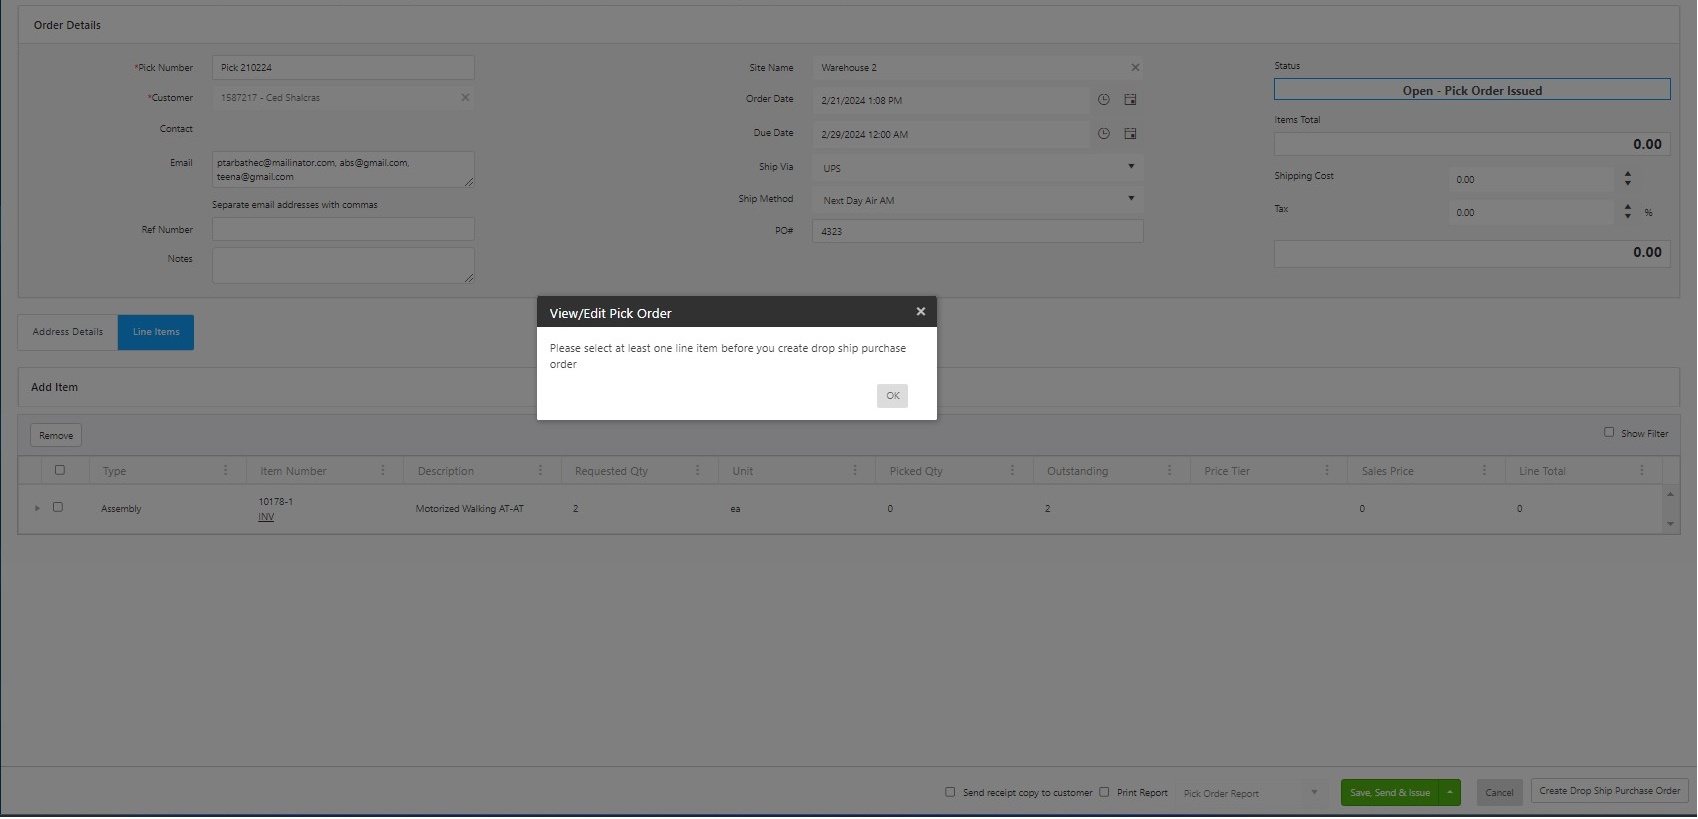
- Click on the Create Dropship Purchase Order button. The screen will navigate to the New Purchase Order screen, where you can create a drop ship order for the pick order you edited previously. To create a purchase order, refer to the New Purchase Order.