New Purchase Order
Purchase orders can be created in Inventory Cloud, emailed directly to your Vendor, or printed for faxing or mailing. We recommend you review the topic Purchase Orders/ Receiving Overview before using the purchase order feature for the first time.
Also, refer to Ordering Settings to turn on or off the purchase order-related settings.
Creating a New Purchase Order
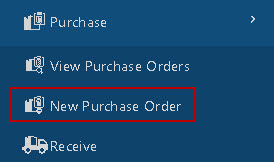
- Click on Purchase > New Purchase Order.
- The New Purchase Order screen will appear.
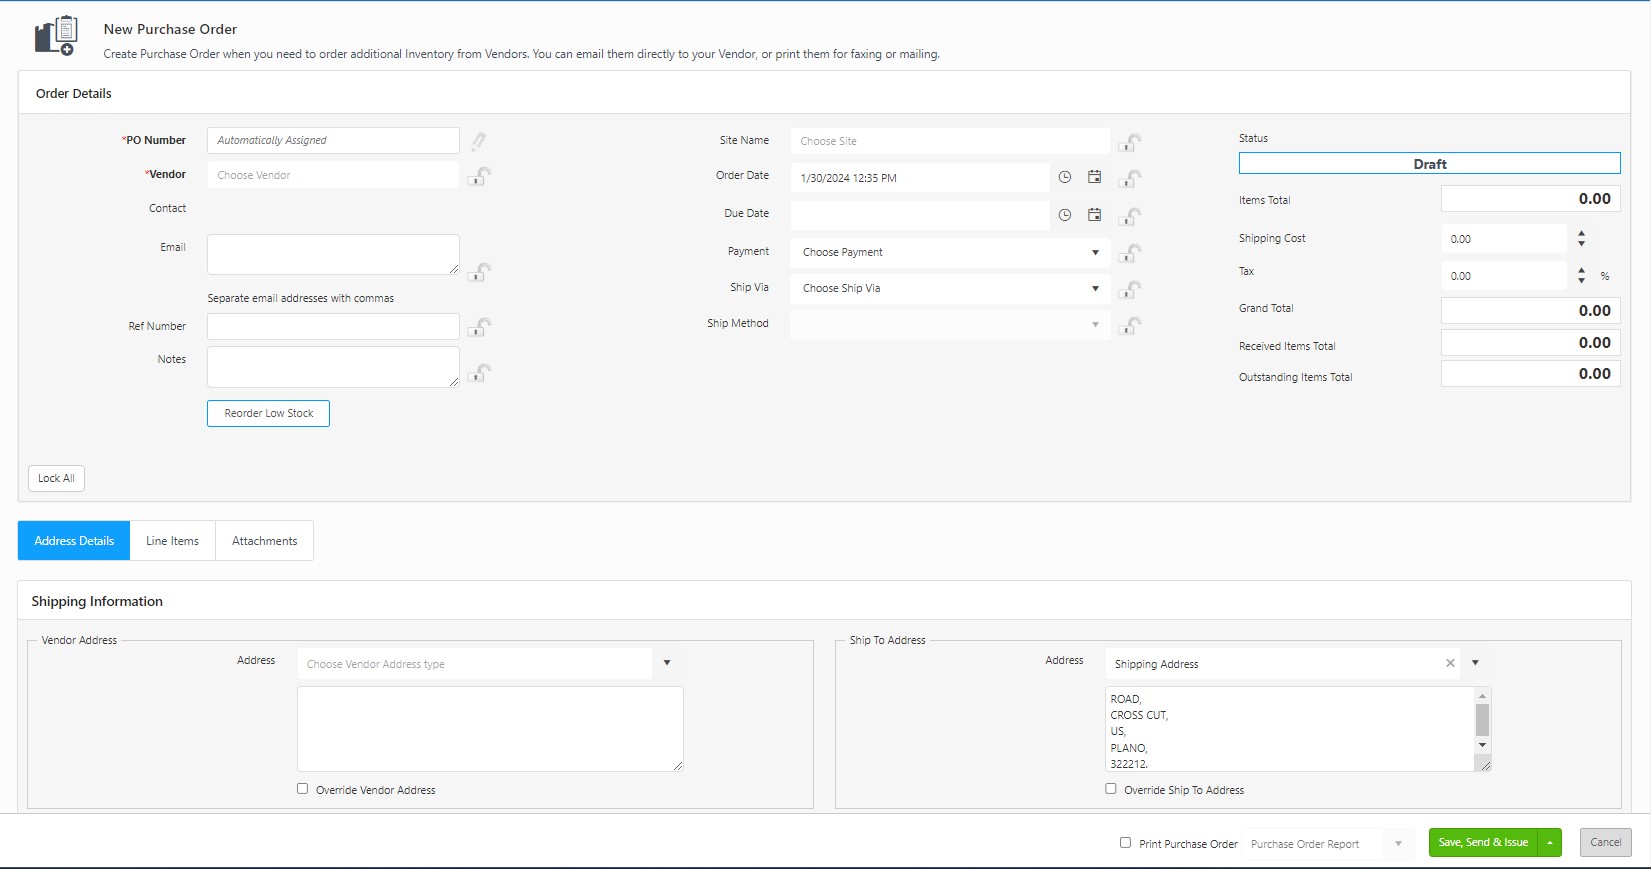
- PO Number - Enter a PO Number for this new purchase order. If you have set up InventoryCloud to generate PO numbers automatically, the field will say "Automatically Assigned," as shown in the image above. Each purchase order is assigned a unique identifier consisting of an alpha-numeric value of up to 30 characters. This number can be manually entered each time you create a new purchase order or create a template that the software will use to generate a number automatically. Create the template using the Number Series screen. You can edit an automatically assigned PO number if needed.
- Vendor - Choose the vendor.
- Email - Enter the email address. It supports multiple email addresses. Separate individual email addresses with commas.
- Ref Number - Enter a reference number for this PO.
- Notes - Enter Notes.
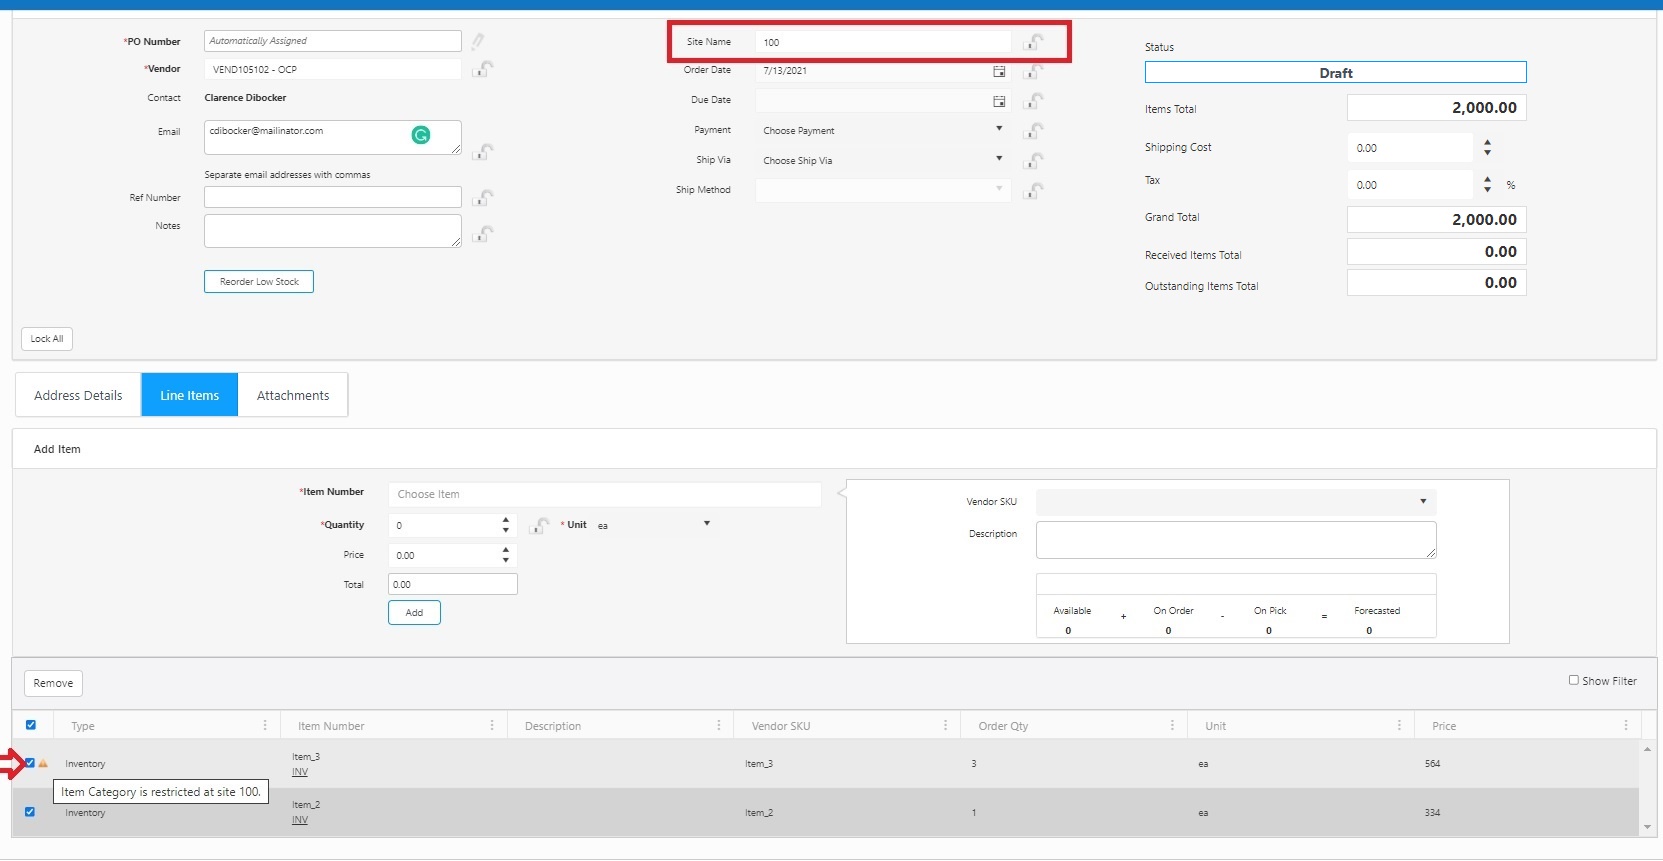
- Site Name - Select the Site. This is optional, but you can associate it with a site when creating a purchase order. With site restrictions and assigning orders to a site, the user will only see PO for their site only. It will also carry into the On-Order qty. For example, a user with access to Site A will not see Site B's purchase orders on the Application when they pull up their orders to receive. The PO will show for all sites if it is not designated for a specific site.
Note: The newly created site will not appear in the site field till an inventory is added to that newly created site. Using Form Customization, you can make the Site field mandatory or required.
Note: While placing a new purchase order, if the selected site name has Site-Item/category restriction, then the Item Number field will display the items that are not associated with any category and the items that are associated with the category selected in the Site-Item/category restriction. If there is already an item in the queue that does not fall in the current Site-Item/category restriction, a warning message will appear indicating that "Item-Category is restricted at the selected site.”
- Order Date - The Order Date defaults to the current date. Change the date by clicking the Calendar icon.
- Due Date - Enter a due date for this purchase order by clicking the Calendar icon.
- Payment - Select the Payment type from the drop-down list.
- Ship Via - Select a shipping provider from the drop-down list. Shipping Providers can be added on the New Shipping Providers screen.
- Ship Method - The Ship Method drop-down list populates based on the Shipping Provider selected.
- Click on the Reorder Low Stock button.
Note: The Reorder Low Stock button will be outlined in red if the selected vendor has items with a quantity below the minimum stock level. When you click on the Reorder Low Stock button, the Reorder Item list will list all the items (associated with the selected vendor) with quantity below minimum stock.

- Select the Items by clicking on the checkbox to add the selected item to the purchase order.
- Status - This status message changes based on the purchase order's status.
- Custom Fields - Enter the information in all the custom fields, if any. The custom fields on the purchase order screen are added through the Form customization screen.
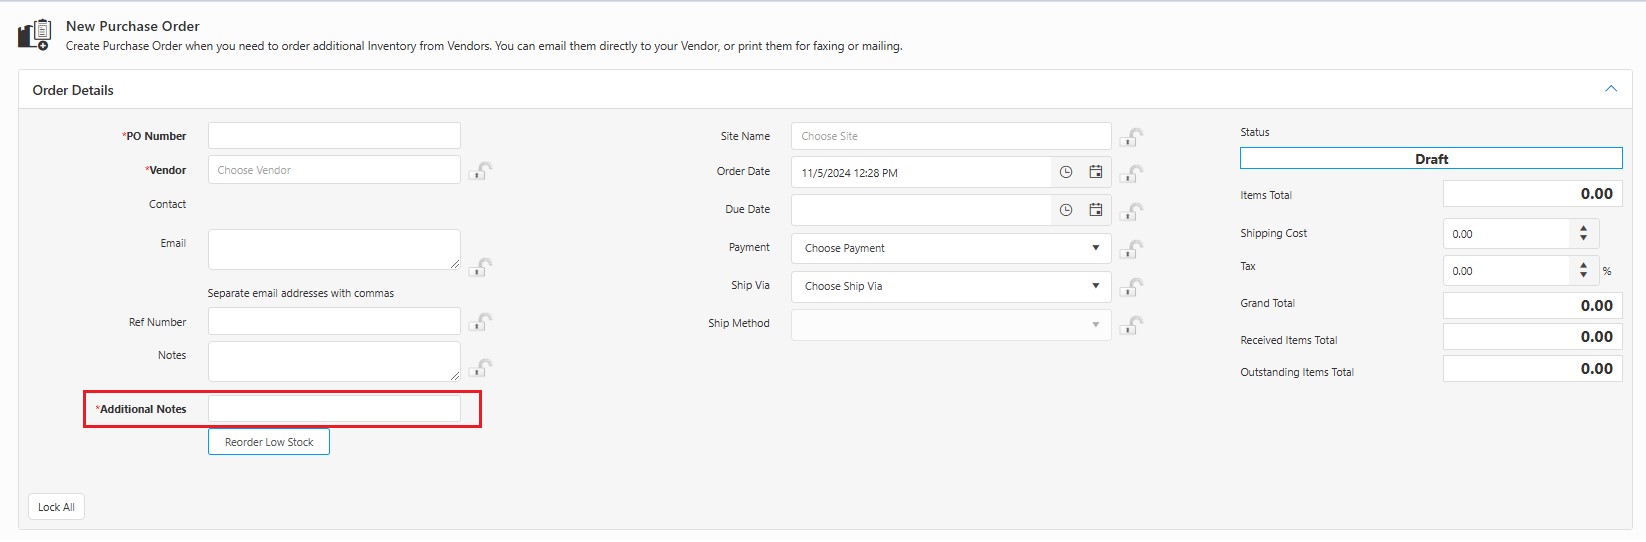
- Calculations:
- Items Total: The aggregate cost obtained by multiplying the quantity of each item by its respective cost.
- Grand Total: It is the asset total above which the shipping costs and tax percentage are applied.
- Received Items Total: The cost of the overall quantity of received items. As items are partially or fully received, it reflects the cost of the received items.
- Outstanding Items Total: The outstanding amount yet to be received, calculated by subtracting the Total Received Items Value from the Total Items Value.
The purchase order can be created without the address details. Use the Form Customization option to make the address field mandatory/required.
- Vendor Address - Select the address type from the Address drop-down menu. The options listed in the menu are populated from the information entered on the New/Edit Vendor screen. The selected address appears in the text field. You can change this address by clicking the Override Address checkbox.
- Ship To Address - Select the address type from the Address drop-down menu. The options listed in the menu are populated from the information entered on the Company Details screen. The selected address appears in the text field. You can change this address by clicking the Override Address checkbox.
- Click on the Line Items tab.
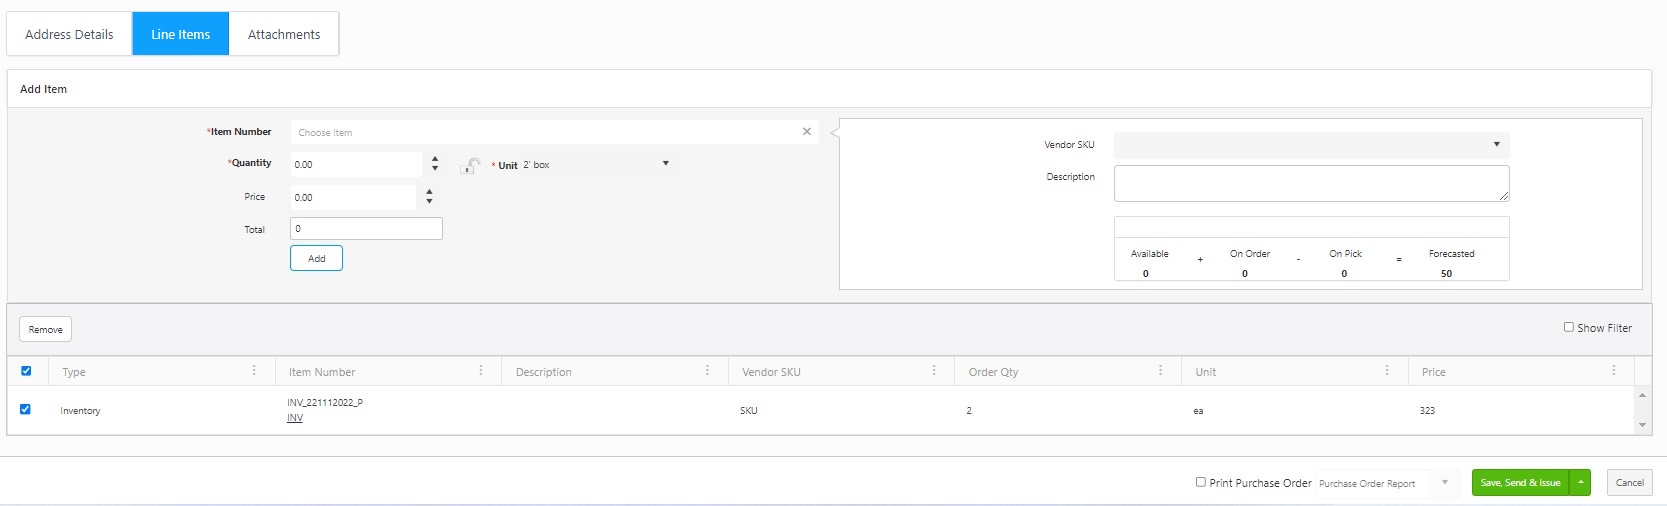
Add items:
- Item Number (required) - Enter the item number you want to add to this purchase order. You can select an item or a container.
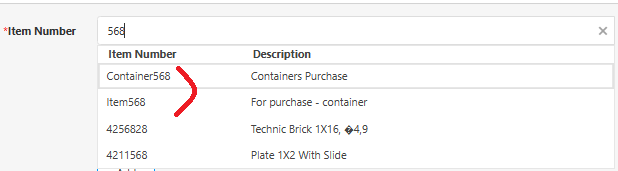
Note: The container feature is scheduled for a future release.
- Quantity (required) - Enter the quantity.
- Unit (required) - Enter the unit.
- Price - The price will populate based on information entered for the item (on the New/Edit Item screen). The price can be edited as needed.
- Total - The total amount will get calculated based on the Quantity/Unit and price.
- Vendor SKU/Description - The Vendor SKU and Description populate based on the Item selected by you (on the New/Edit Item screen).
- Available/On Order/On Pick/Forecasted - These fields reflect quantity levels for the selected item. Note: Forecasted = Available + On Order - On Pick.
- Click on the Add button. The item will appear in the list at the bottom of the screen. To remove the added item, click on the Remove button after selecting the item by clicking on the checkbox.
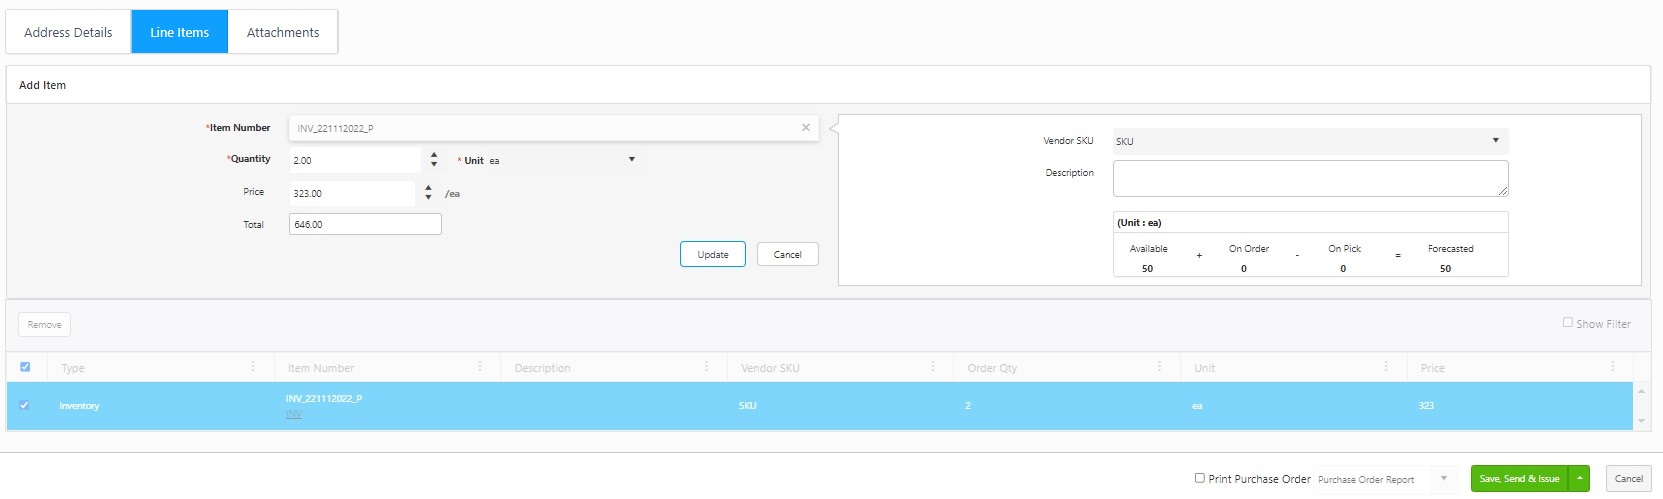
- To update the details in the Bottom Grid/ Item Queue section, click on the line item to be updated. The selected item will be highlighted in Blue, and the details related to the item will populate in the top grid of the screen. You can update the required details and click on the Update button.
Attachments Tab:
- Click on the Attachments tab.
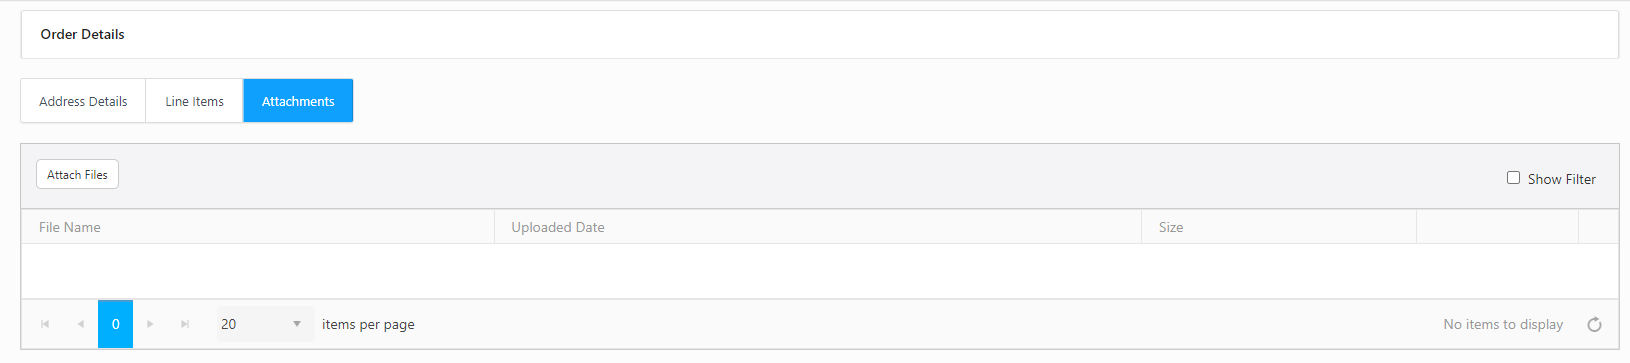
- Click on Attach Files button. Click on Select Files and Attach.

- The attached file can be edited using the Edit button and can be deleted using the Trashcan icon. Select the Show Filter checkbox to filter the list.

- To print the purchase order, click on the checkbox next to Print Purchase Order. Note: If the pop-ups are blocked, and you cannot view the print receipt, Refer to Popups and Redirects to allow pop-ups and to view the print receipt.
- Click the Save, Send and Issue button when you are ready to complete the purchase order. The order will be sent to the email indicated on the purchase order. You can also click the Save not Send button if you do not want to send the purchase order and only want to save the details. The Save not Send button will appear when you click on the drop-down button next to the Save, Send and Issue button.

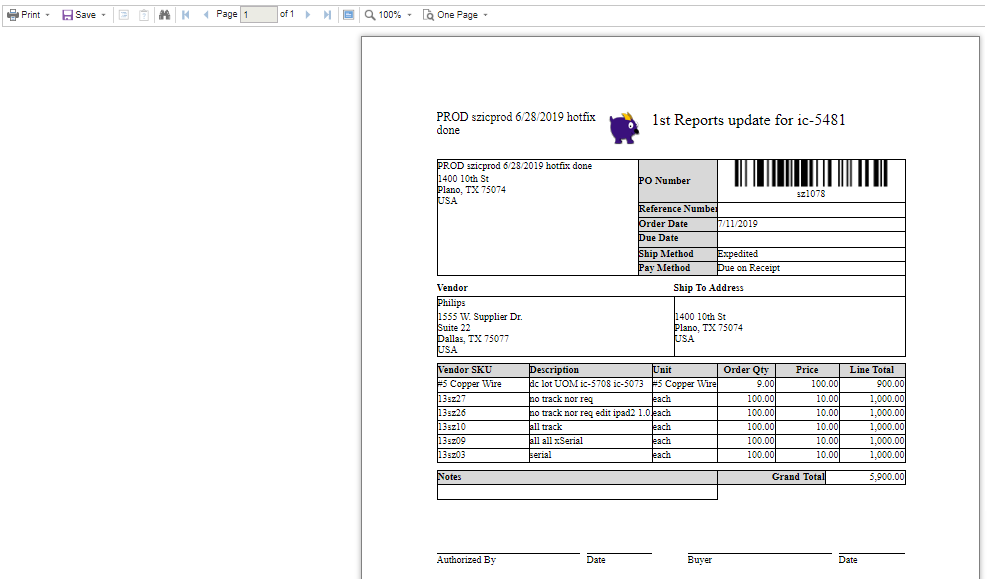
- A message will appear indicating the purchase order is successfully issued, and a print receipt will also be generated (if the Print checkbox option is selected)
Message

Print Receipt
View/Edit Purchase Order
The View /Edit Purchase order allows users to edit the purchase order-related details.
Click on Purchase > View Purchase Orders.
Search for the Purchase Order to be edited.
Click on the PO number.

The View/Edit PO's screen will appear.
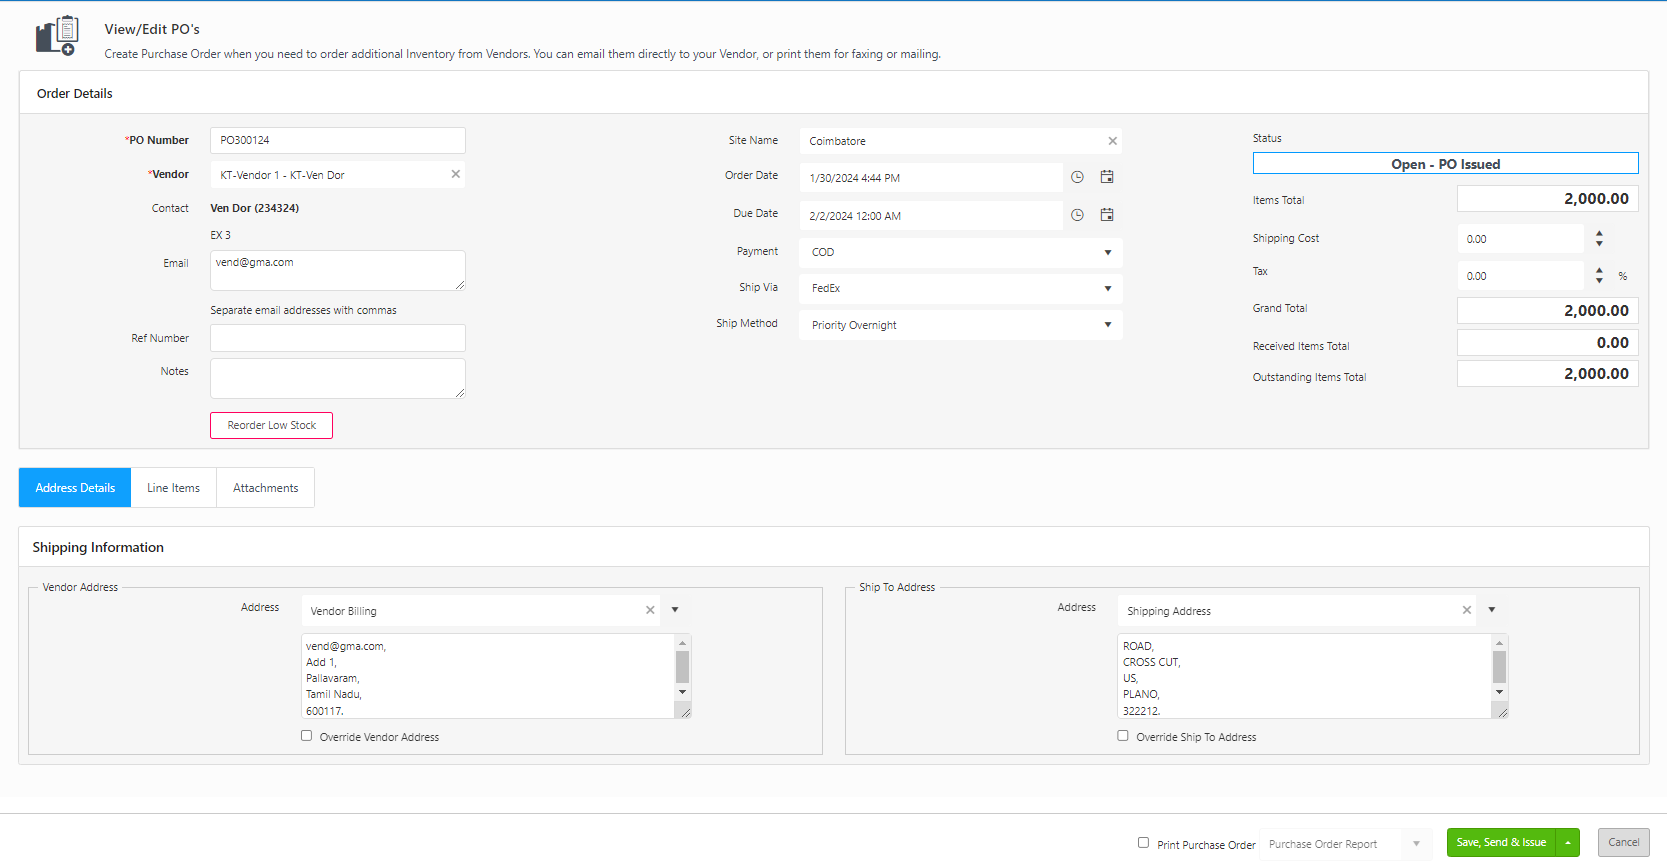
Edit the required details. Refer to the topic New Purchase Order for more details.
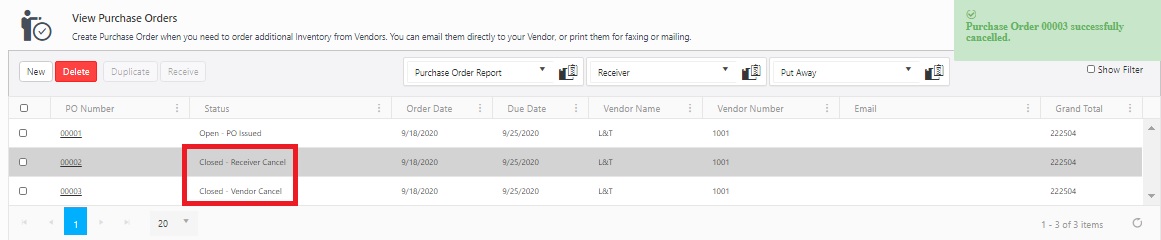
The Purchase Order can be cancelled using the Cancel Order button or Cancelled by Vendor button.
On cancelling, a message - "Are you sure you want to cancel this Purchase Order?" will appear, asking for confirmation. Click on yes to proceed.
A message will appear intimating that the order is cancelled. The Status will change to Closed - Receiver Cancel if you click Cancel Order and Closed - Vendor Cancel if you click Cancelled by the Vendor button.