Purchase Orders/Receive Overview
Purchase orders can be created in InventoryCloud when you want to order additional inventory from vendors. These orders can be emailed to the vendor and/or printed upon creation and can be easily referenced and searched in the system. When you receive a shipment of the items on the purchase order, the items are marked as received on a Receive screen. You can also create backorders for all or some items from an existing purchase order.
InventoryCloud allows you to create purchase orders for:
- Inventory Items - This item is already in your inventory database. Use this to re-order existing items.
- Non-Inventory Items - Your database does not list this item as inventory. Use this to order items you do not want to track inventory, such as marketing fliers or business cards.
- Service Items - Use this option to add one-time items, such as shipping and handling, to an order. Note that you cannot receive manual items on mobile devices.
With a little advanced planning, you can automate much of the purchase order creation process. Setting up these four pieces before you create purchase orders will speed the process:
- Set up preferred vendors for your items. When you enter the item number on the purchase order, the vendor information will automatically appear on the order.
- Selecting a vendor for an item and entering the shipping unit of measure. This information will also automatically appear when you select an item on the purchase order screen. You enter preferred vendors on the New Inventory -> Vendor tab. You enter the vendor unit of measure information on the Create New or Edit Vendor screen below Lookups.
- Configure settings to enable automatic purchase order number generation and also set up Number Series so that the purchase order number is auto-generated.
- Make sure you enter a minimum stock level for your items and enable automatic notification. This enables InventoryCloud to notify you of items that have reached the reorder point in a report broken down by location. You can enter the minimum stock levels on the Location tab of the New/Edit Inventory screen. Create New or Edit Item screen, Locations tab.
- Enter the vendor's email address on the Create New or Edit Vendor screen. If an email purchase order setting is enabled, the email will be sent to the vendor automatically. You can enter email addresses for your vendors
To further streamline the process, you can use a barcode scanner to add information to the scannable fields on the create new purchase order screen, including vendor, purchase order number, and item number.
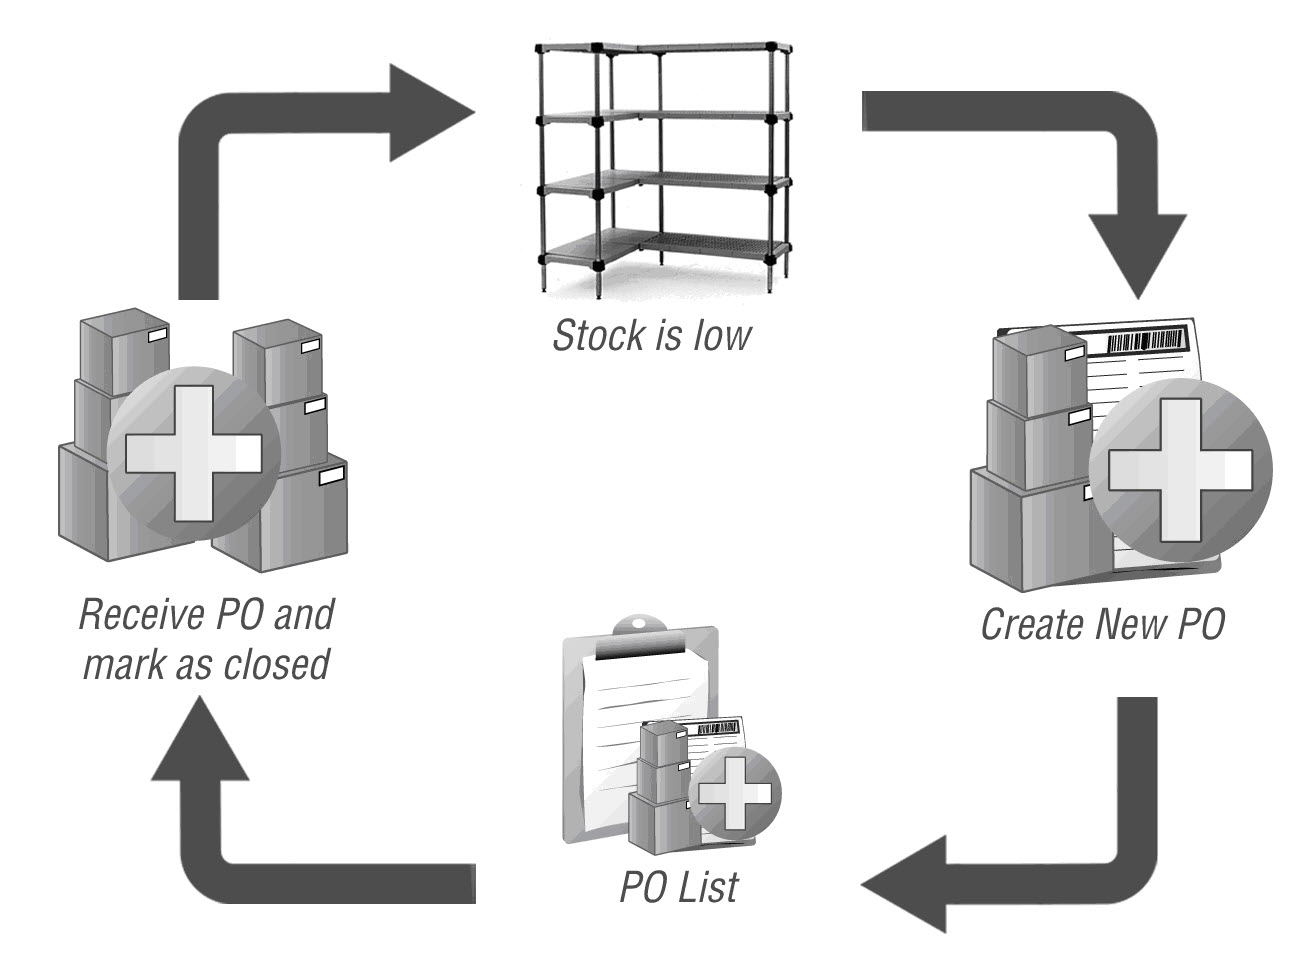
The basic flow from purchase order creation to receiving the items is:
- When you need to replenish inventory for an item or items, create a purchase order on the New Purchase Order screen (accessed from New > Purchase Order).
- Select a vendor.
- The system will then check the stock level. If it is low, then the Reorder Low Stock button gets highlighted. Select the Items.
- Or click on the Line Items tab and select the items. Enter all the required details, like quantity.
- On saving, the newly created purchase order will be listed on the View Purchase Orders screen. You can access the View/Edit purchase order screen via the View purchase order screen and you can delete the purchase order as long as the order has not been partially received.

- When you receive inventory for the purchase order, you will enter the quantity received for each item on the Receive screen. You can mark inventory for an item as received on the web or mobile devices. This screen allows you to enter quantities received by location and can optionally show you costing information as well.
Note: When the user makes an update on any Purchase Order, the status of the purchase order will also get updated.
- Draft OK - When a new purchase order is created and saved but not sent (i.e., New PO created -> Saved Not Send). The status will be Draft Ok.
- Open - PO Issued - When a new purchase order is created, the order is sent and issued for further processing (i.e., New PO created -> Save, Send & Issue). The status changes to Open - PO Issued.
- In Progress PO Received short - When the items are received partially, the user enters the quantity and saves the changes in the receive inventory screen. The status changes to In Progress - PO received short in the View PO screen.
- In Progress - PO Received complete - When the items are received (fully) and the quantities are entered into the Receive screen (i.e., Receive ->Quantities received > Saved). The status changes to In Progress - PO Received Complete. (The items are received fully, and on the receive screen, the PO is still not closed, i.e., only it is 'Saved', not 'Save & Close').
- Closed - PO Closed Short - When the items are received partially, the user closes the order and creates a backorder. (Even the status remains the same if the order is just 'Closed' with creating a backorder).
- Closed - PO Received complete - When the quantities are entered in the Receive screen, and the purchase order is saved and closed.