New User
A User is anyone who will be accessing InventoryCloud. You can create as many users as you want, but keep in mind that you can only have as many "Active" users as allowed by your license. An Active user is someone who can perform functions in InventoryCloud.
You will assign users to specific roles which determine the functions to which they have access. You should create your Roles before adding users. If you are using Single Sing On, you must create Roles in InventoryCloud that exactly match the groups/roles in the ADFS server. Please review Active Directory Federated Services (ADFS) – Configuration under Single Sign On (SSO) for more information.
Note for On-Premise Users: Standard versions of Wasp On-Premise products are initially licensed for a single user, so it is likely that you won't have enough free licenses to invite a new user. You can simply continue using the admin user account provided, renaming it or you could - Edit the existing admin user to remove the membership of the Administrators group thus freeing up that license. (You can not remove the "Is app admin" flag.) and Invite your user using "Add User". Refer to SMTP settings.
Note: An email invitation to join InventoryCloud is sent to each new user you create. If you have not completed the SMTP options in Email Settings, you will receive a message to do so when you click the New button on the View User screen.
To Add a User
- Click on Manage > Users >
 button:

Or
Select Manage > Users > New button in the View Users screen.

- The New User page appears.
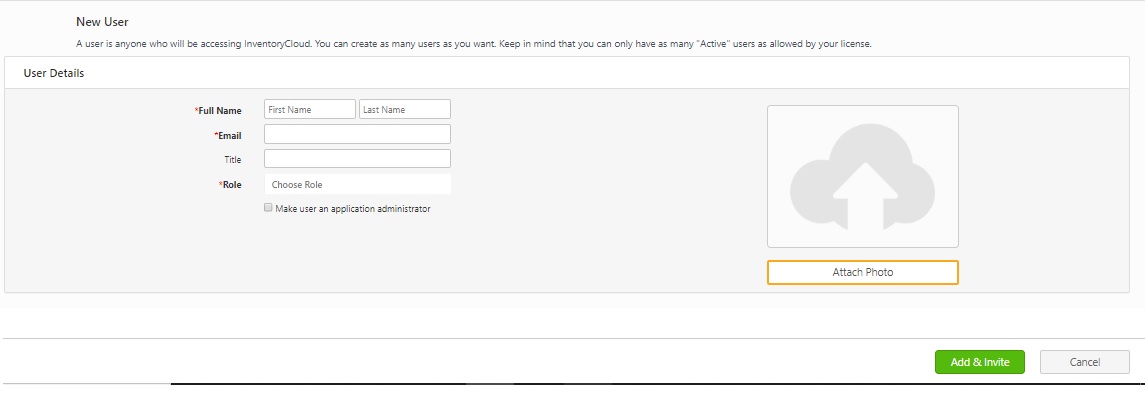
- Enter the First Name and Last Name of the new user (mandatory).
- Enter the Email address of the user (mandatory). InventoryCloud uses the email entered here to send Notifications to this user. This address is also used to send the initial invitation email that will allow the user access to InventoryCloud.
- Enter the Title of this user.
- Select the role from the dropdown, which will list both in-built and user/admin-created roles. Users will be granted access and permissions associated with the selected role.
- Click on the checkbox to Make User an application administrator.
Note on Application Administrators: The Application Administrator does not use a license. Only an Application Administrator can edit or delete another application admin. A user who is NOT an application administrator, but has been given User editing permissions can only edit or delete another non-application administrator.
Note on Public API Access Token - Calls made using a Public API Token will be subjected to the same security restrictions as the user for which the token is created. A user can not create a token for a user with more rights than he currently has. So for full access to all Public API functions without any permission restrictions, we still recommend creating the Token from an administrator account with App Admin privileges.
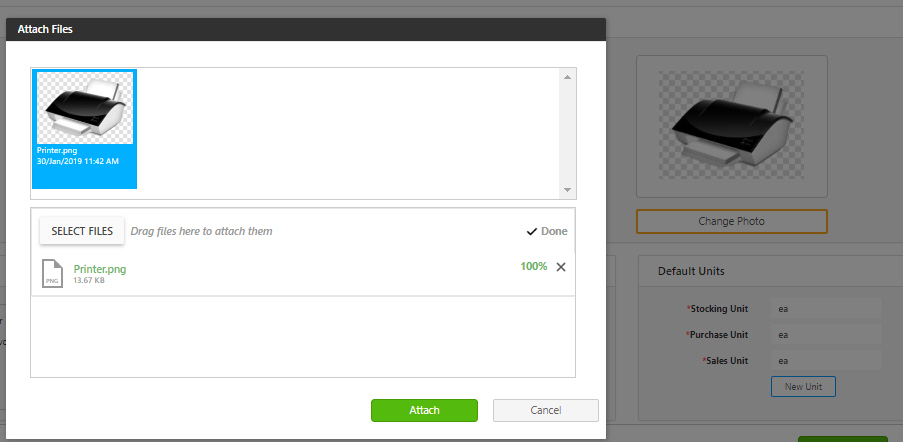
- Click on the Attach Photo button to add a photo of the user. To attach a photo:
- Click on the Attach Photo button. The Attach Files pop-up screen will appear.
- Click on the Select Files button. Select the picture and click on the Open button/ Drag and drop the picture. The selected file will appear in the list at the top of the screen. Click on the Attach button.
- When you are finished entering information, select the Add & Invite button. InventoryCloud will generate and send an email to the user with instructions for accessing the system.