Remove Inventory
The Remove Inventory screen allows you to reduce the quantity of any item in your inventory, similar to the process of shipping inventory. You can also designate the customer associated with the removed inventory on this screen.
Note:
- Ensure the item is available in the application before attempting to remove it. Items can either be added manually or imported. For more details, refer to the topics Import Data and Add Inventory.
- Inventory quantity is also reduced or removed when an item is picked. For further details, see the topic Pick Orders.
- The Remove function follows the FIFO (First In, First Out) method to determine which inventory is removed first. Example:
- If you initially add 5 units of Item 123 to Location Bin 1 and later add another 5 units of the same item, the total inventory becomes 10.
- When you remove 3 units of Item 123, the system will subtract these units from the first batch of 5 before using the second batch.
Inventory can also be removed on iOS and Android devices.
Remove Inventory
- Select Transactions > Remove.
![]()
The Remove Inventory screen will appear.
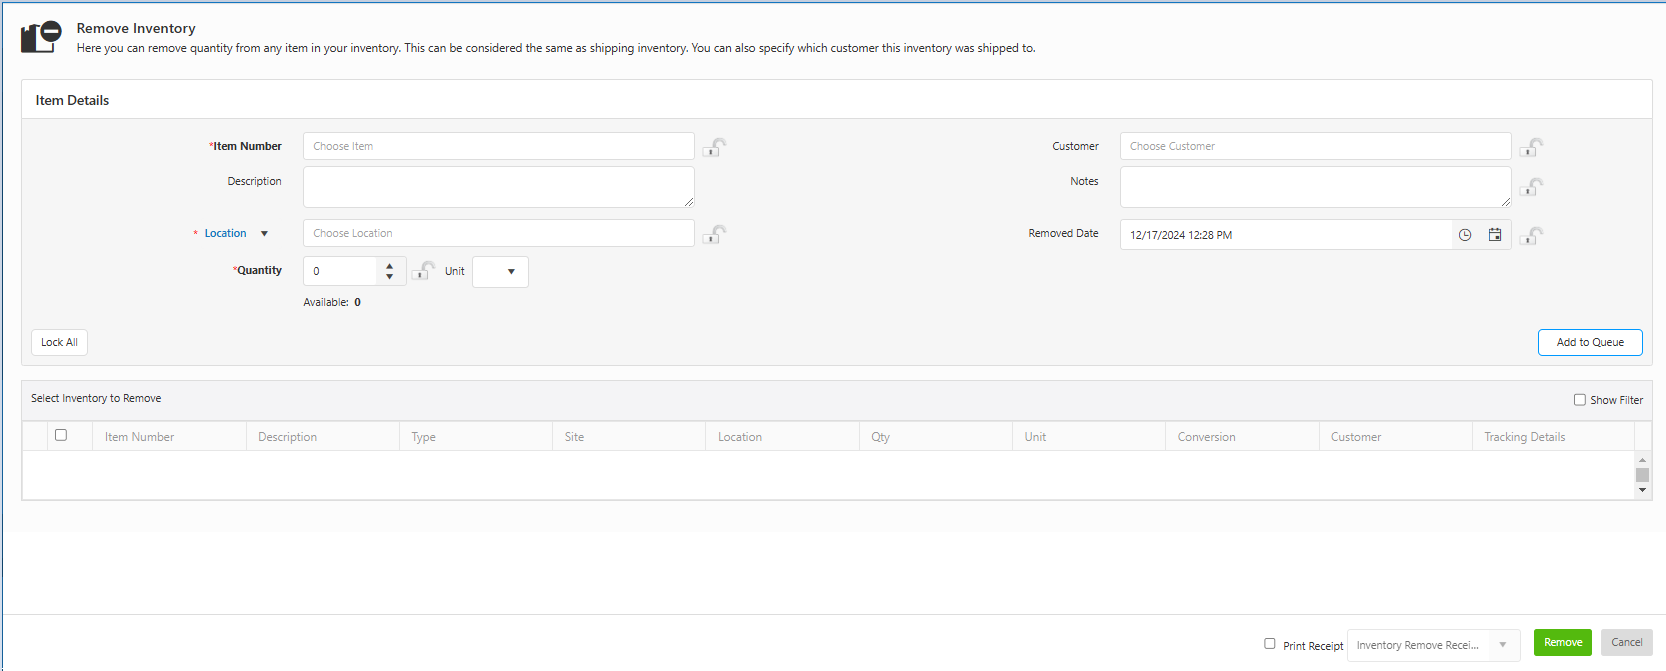
Note: Several fields in this section can be "locked". When a field is locked, it will retain the information you entered through subsequent transactions. This is useful if you add multiple items to a location or check out multiple items to a single customer. To lock an individual field, click on the lock icon. You can select the Lock All button to quickly lock all fields that have the icon. Select Unlock All to unlock the fields, allowing you to add new information. Click here for information on how to Lock fields.
Item Details
- Choose an item to proceed. The item can be an inventory, assembly, kit, container, or container ID. The dropdown will display the Number, Description, and Type, where the Type may include item, container, container ID, serial number, etc.
Note: The container feature will be available in a future release.
- Site-Item/Category Restrictions on Remove Transaction - The Remove Transaction allows users to remove item quantities even if the item is at a restricted site. For more details, refer to the topics: Site-Item/Category Filtering on the Edit Site page and Working Site.
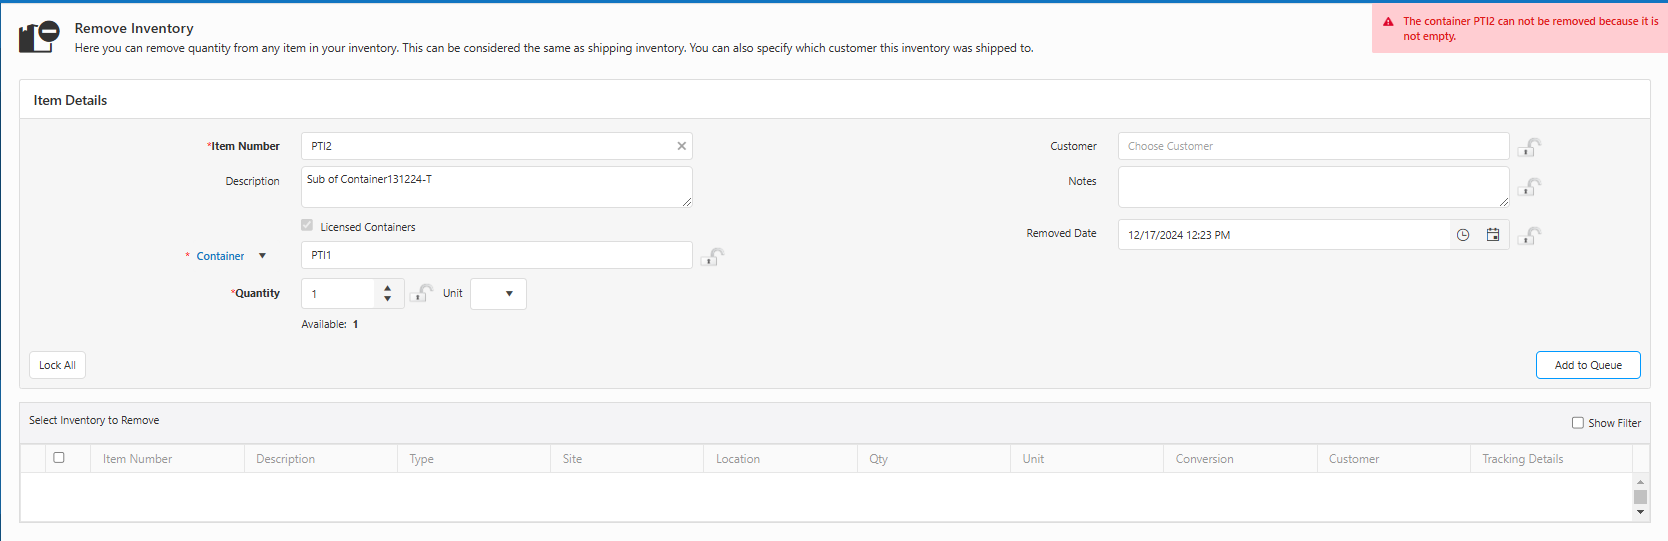
- Removing Containers with Items Inside - If you select a container that contains another container or item, you will see the message: "The container 'XXX' cannot be removed because it is not empty." To proceed, you must either remove or move the contents (container or item) to another location before attempting to remove the container.
- The description field will auto-populate if a description is provided while adding the inventory.
- Select Location/Container
- Use the dropdown menu to choose the location or container where you want to remove the item quantity (required).
- The location will typically auto-populate when you enter the item.
- Hovering over the location will display the site and location name.
![]()
- Hovering over a selected container will show its site, location, container type, and container ID.
![]()
Autocomplete Dropdown
- The location/container field is an autocomplete dropdown for searching either locations or containers.
- If no matching containers are found (with a search query), the dropdown will automatically switch to search for locations, and vice versa.
- The field name updates dynamically between "Containers" and "Locations" based on the search results.
- In the location dropdown, site and location details are displayed. In the container dropdown, the site, location, and container ID are shown.
![]()
- Enter the quantity of the item you want to remove from the inventory. The available quantity for the selected item will be displayed below the Quantity field.
- Select a customer (if applicable).
- Notes (Optional) - Add any relevant notes.
- Removed Date and Time - Click on the calendar and clock icons to select the date and time when the item was removed.
- Tracking Details - If the item has tracking requirements (trackbys), a Tracking Details button will appear. Refer to the Tracking Details topic for additional information.
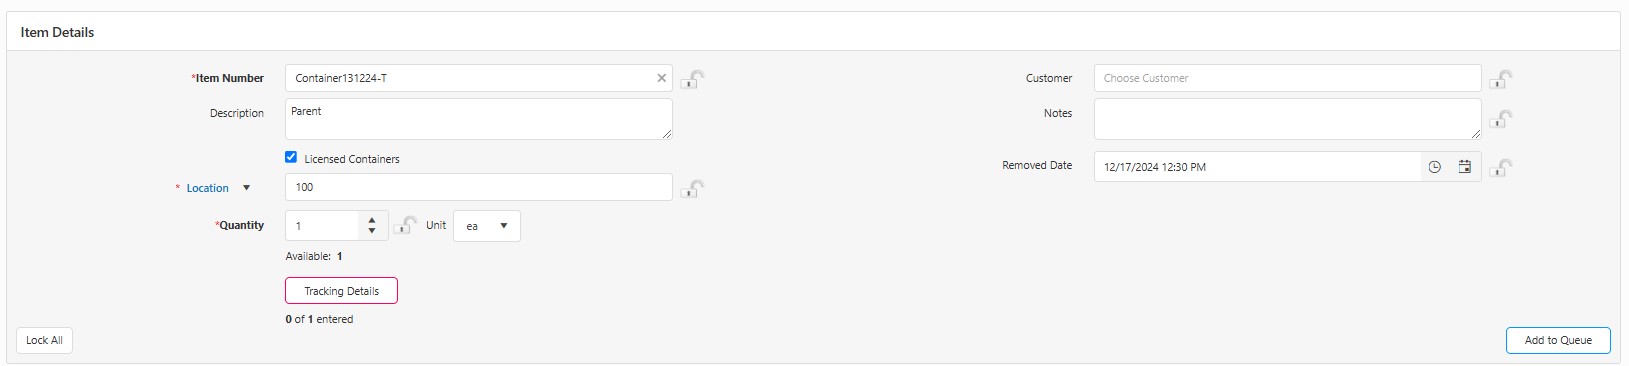
- Once all details are entered, click the Add to Queue button to complete the process.
- The added items will appear in the Select Items to Remove grid at the bottom of the screen. You can view sub-items by clicking the drop-down arrow next to the checkbox.
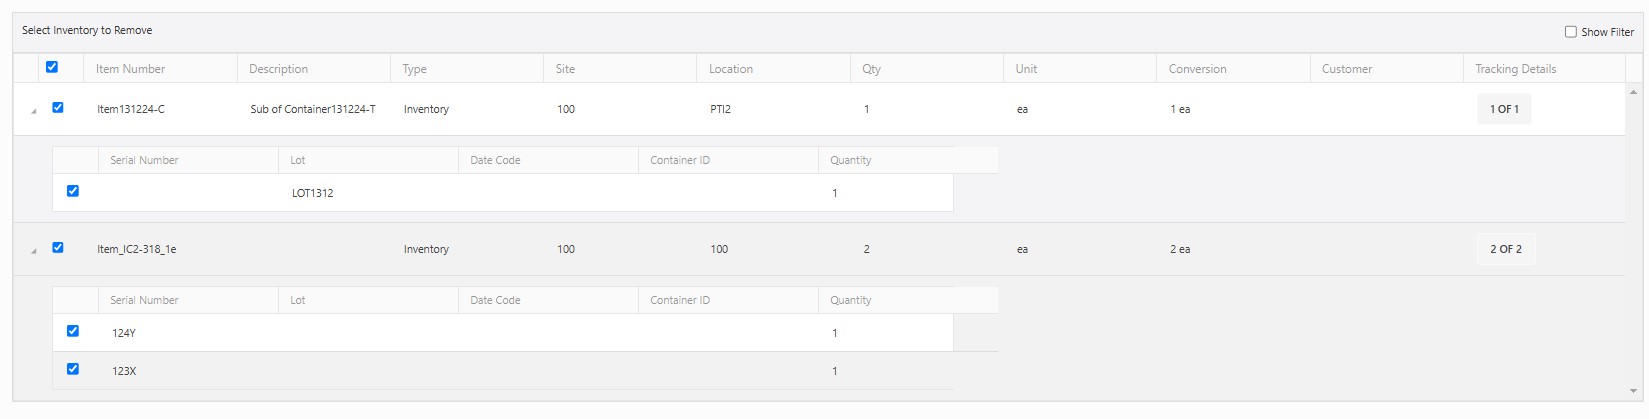
Note: To remove a kit, the sub-menus will display the KIT, showing its Bill of Material.

- The Location column will show the site and location name when you hover over it with the mouse. Similarly, hovering over a selected container will display its site, location, container type, and container ID.
![]()
- To modify inventory details for an item:
- Select the item from the bottom grid. The item details will auto-populate.
- Make the necessary changes, then click the Update button.
- Alternatively, you can use the Scan option to update details. To switch back to manual editing, click the Edit button.
- Continue adding items for which you want to remove inventory.

- Print Receipt
- To print a receipt, check the Print Receipt checkbox. To customize the receipt header, enter the desired name in the text box next to the checkbox.
Note: If pop-ups are blocked and you cannot view the print receipt, refer to the topic Popups and Redirects for instructions on enabling them.
- Click the Remove button. A confirmation message will appear, indicating that the inventory has been successfully removed.
Note: Be sure to select all transactions you want to process before clicking the Remove button, as only selected transactions will be processed.

- The receipt will open in a new tab once you click on the remove button.